Showing posts with label Stickles. Show all posts

Tuesday, September 13, 2016

Sue Wilson Poinsettia Mini Striplet and Poinsettia Dies

Hello Everyone!

Today I have a poinsettia card to share with you.  It's a simple design, yet with the sparkle of the stickles, it makes a pretty Christmas card.


Supplies used:

Dies:   Sue Wilson Poinsettia Mini Striplet, Poinsettia set of outlie and complete petals, Holly leaves
Stamps:   Serendipity Stamps - Merry Christmas
Other:   Stickles, gems, and peel offs

Thanks so much for stamping by,
            Anna

Wednesday, August 31, 2016

Simple Birthday Cupcakes

Happy Wednesday!

Here are two birthday cards I made over this past weekend.  And literally, the stickles was drying on the second card while I jumped into the shower to get ready for the 50th party I was going to!!! LOL


I needed to make the card for a friend's 50th birthday and I thought that I was finally going to use my "tool" dies, BUT that didn't happen. The week flew by and I didn't even start with pulling the colors together. So, on Friday I decided to make a cupcake card after a browsed Pinterest over the past few days. Next our Matushka left me a message and was hoping that a had an extra card lying around for our Bishop's birthday!  I had to laugh..........as everyone knows that I have A LOT of sample cards, but not to use. Just like the shoemaker's kids not having shoes, I'm the card maker with no cards! LOL.   But I couldn't say no, I mean it was for the Bishop and I truly felt honored that Matushka thought of me. So, I told her that I did have pieces cut for a birthday card that only needed to be put together. Or since I was planning to make Bill's card in the morning, and if I liked the way it was developing, I would make another card at the same time.

Well, as you can see, I ended up making two cupcake cards! I would have loved to have made a more elaborate card for the Bishop, plus at least a 5X7 card, so that it would be big enough for everyone to sign, BUT time just didn't let that happen.

As I was creating the card, I really liked it; it is so cute!  Matushka loved it and I was very thankful!


Here are close ups; you can see the detail of the embossing folder.  


As you know, I'm so in love with the teal color combo. Also, notice that I only used strips of teal card stock underneath the saying; a great way to save on colored card stock! 
 
Lastly, the bit of stickles on the frosting and candle was just enough to make everything pop!
 
I know I will be using this layout again; it's simple, cute and pretty fast! You can make several of these pretty quickly!
 
 
Supplies used:
 
     Dies:      Marianne Creatables Cupcake die (it includes the candle and two different cupcake frostings)
     Embossing folder:     Cuttlebug Birthday Sayings
     Stamps:    Hero Arts Birthday sayings clear set
     Other:      Stickles and gems
 
 
Thanks so much for "stamping" by!
               ~Anna


Monday, August 15, 2016

Christmas Joy

Happy Monday!
Hope you are enjoying the summer and it's not too humid where you are!  We've been having a heat wave and the humidity has been horrible!  I don't remember when it was this bad.  Yesterday was better and I think it will improve slowly.  (I can't complain too much though, since I do hate the winter cold and snow!)

So, thinking about winter, I'd like to share with you a Christmas card I made and used in a class this past weekend.  I got the inspiration from Sue Wilson, the designer of the Joy die!  I saw the card she made with this die and I just fell in love with this color scheme; cream and gold is such an elegant look!  You can see Sue's creation HERE.

Sue Wilson's cards are actually beautiful pieces of art because she makes the cards quite large; usually 5X5 or 6X6.  My card is a regular A2 size card.  I didn't have a large nativity star die and so I went with the bells.  I also added micro-fine glitter to the edges and lots of stickles to the "snow" on the card.  I am really pleased with the way it turned out.


Now, Kittie Caracciolo is another talented designer and if you go to HER BLOG, you can see this die set used in the traditional red and green color scheme; very simple, yet also elegant.

This die was released in the winter of 2014, (and I finally used it! Yay!) I am happy to inform you that it is still available!  Please let me know if you want to reserve it for yourself!

Supplies used:
Dies:    Sue Wilson, Joy, Impression Obsession small Christmas charms, and small pine branches
Other:  Sizzix/Hero Arts "Snow" embossing folder, Micro fine glitter in Sahara, stickles

Thanks so much for stopping by,
       ~Anna

Monday, July 20, 2015

Birthday Cupcakes!

Hi All,  Hope you are enjoying your summer.  We've past the half way point of July :(  Boy where does the time fly?

I'd like to share with you a birthday card I made for my daughter, Maria, who loves a good cupcake.


It's a simple layout, yet it focused on the happiness of cupcakes.  I also got to use one of the new border dies from Tattered Lace, which was included in their #17 magazine.

Supplies used:
Dies:  Marianne Creatables Cupcakes die, Tattered Lace lacey border die
Stamps:  Impression Obsession "It's a cupcake kind of day"
Other:  Tattered Lace Ditsy Dots embossing folder
Card size:  4" X 8"

Thanks for "stamping" by,
             ~Anna

Wednesday, July 1, 2015

Awesome Flower Tags! and a Baby One too!

Happy July !!!  Due to popular demand, we will be repeating the Flower Tags Workshop this Sunday, July 5th, at 1:30pm.  (Don't worry, this should give everyone enough time to attend church before class.)


You'll make these 4 fabulous tags PLUS this very cute giraffe tag!!!!


Tags are so versatile, especially when you seem to run out of time to make a card!!! LOL And it always seems to happen to me!!!
I therefore, just added the orchid tag to the gift bag and look how it saved the day!!!


Supplies used:
Dies:   Orchid and Love dies by Dee's Distinctively Dies, Spellbinders Romantic Rectangles, Impression Obsession Mini Tags, Small Picket Fence and Mini Solid Butterflies, Pansy flower by Leane Creatief, Sunflower by Marianne Creatables, Cheery Lynn's Chrysanthemum and leaf flourish
Stamps:   Impression Obsession, Lawn Fawn and Outlines

Thanks so much for "stamping" by,
                ~Anna

Monday, June 29, 2015

Axios!

Last month our new parish priest graduated from seminary and our bishop also made Fr. Gregory's appointment to our parish permanent!  Everyone was very happy and in honor of the occasion, I made a special card for Father Gregory and Matushka Kathy.


I used all dies on the card and "Axios" was computer generated.  I really like the beautiful cross die by Die Versions.

By the way, the meaning of the Greek word Axios is an acclamation of faith. Adopted by the early Eastern Orthodox church, it is made by the faithful at the ordination of bishops, priests and deacons.


Supplies Used:
Dies:   Cross - Die Versions, Cherry Blossoms - Cheery Lynn, Stem flourish and Pretty oval - Marianne Creatables, Large square lattice - Nellie Snellen
Punches:   Mini flower/butterfly set - Nellie Snellen
Other:  Peel off circle ruby gems, Viva Decor pearl pen and Stickles

Thank you so much for stopping by,
                 ~Anna

Wednesday, May 13, 2015

Love those Hummingbirds

I love to sit out on my back deck and watch the hummingbirds find their way to my feeder.  It always amazes me that these tiny birds know where the food is and find it within a day of hanging the sweet nectar after a long winter!  Just think, not being around for all those months and yet they find the feeder within a day or two!!!  Truly amazing!  And the sound the wings make - I remember the first time I heard it, I thought a huge bee was buzzing around!  Beautiful Mother Nature!

You can see pictures I was able to capture of these beautiful birds HERE.

Therefore, once I saw this new flower sprig die from Leane Creatief, I knew I could use it with the pretty small hummingbird from Dee!  And I have to say I love the way it came out -- such a happy card, full of spring and color (after this long and very cold winter).


I used mulberry paper for the wings to give it a light and feathery look.  I know you all have at least one or two huge sheets of mulberry paper stashed away from days ago and now you can pull it out and use it for bird feathers!  Love it when we use our old stash!

The overall size of the card is approximately 6 inches round and by using the envelope punch board, you can make a nice, one of a kind envelope for this special card.

Supplies Used:
Dies:  Dee's Distinctively Small hummingbird left,  
           Leane Creatief Lea'bilities flower sprig,
           Marianne Craftables Passe partout - oval
          Spellbinders Grand decorative circles and classic nesting circles
Embossing folder:  8 1/4" X 12" dots embossing folder
Other:  Viva Decor pearl pen, Stickles


Thanks so much for stopping by!
               ~Anna


Friday, May 9, 2014

A Peaceful Garden

Happy Friday Everyone!
Recently I was asked to create a special Mother's Day card for someone.  Pat wanted it to be a 3-D Pop up card in a box so that her mom could display it on her desk and enjoy it year round.

Pat told me that her mom's favorite color is purple;  her mom loves flowers and old fashioned hearts and she doesn't like butterflies, birds nor any insects.  So right away I felt a bit challenged since whenever I need to fill a space, I just stick a butterfly or bird on it!  LOL!

I went to work by thinking what design I could come up with.  I also flipped through my dies and saw the pretty lattice garden trellis that I haven't used yet and thought I just have to use it.  I was so glad that the width of the trellis fit perfectly into the box!  What luck!!!

And so I started to put the scene together.  I said it before and I'll say it again, it is so much fun building the scene and watching it grow.  I decided to have the flowers go up the trellis as well as some behind it and even attached some to the back of the box to give it more depth.   Pat also told me that her mom likes cats and so I added a cat to the scene.

I was so happy when Pat picked up the card today and she was very pleased.  She said I truly captured her mom.  How wonderful!

Supplies used:
Dies:  Cheery Lynn - grass border, flourish leaf strip, baby's breath flower kit, cuties 2
          Impression Obsession - clouds, sun & moon, tiny flowers, leafy branch, cat set
          Marianne Craftables - garden trellis
          Nellie Snellen multi frame dies MFD 022, MFD 020
Stamps: Just Rite
Other:  Stickles, Copic markers

Thanks so much for "stamping" by
and have a wonderful weekend celebrating Mother's Day!
                                 ~Anna

Saturday, April 26, 2014

Another 3-D Pop Up Card in a Box!

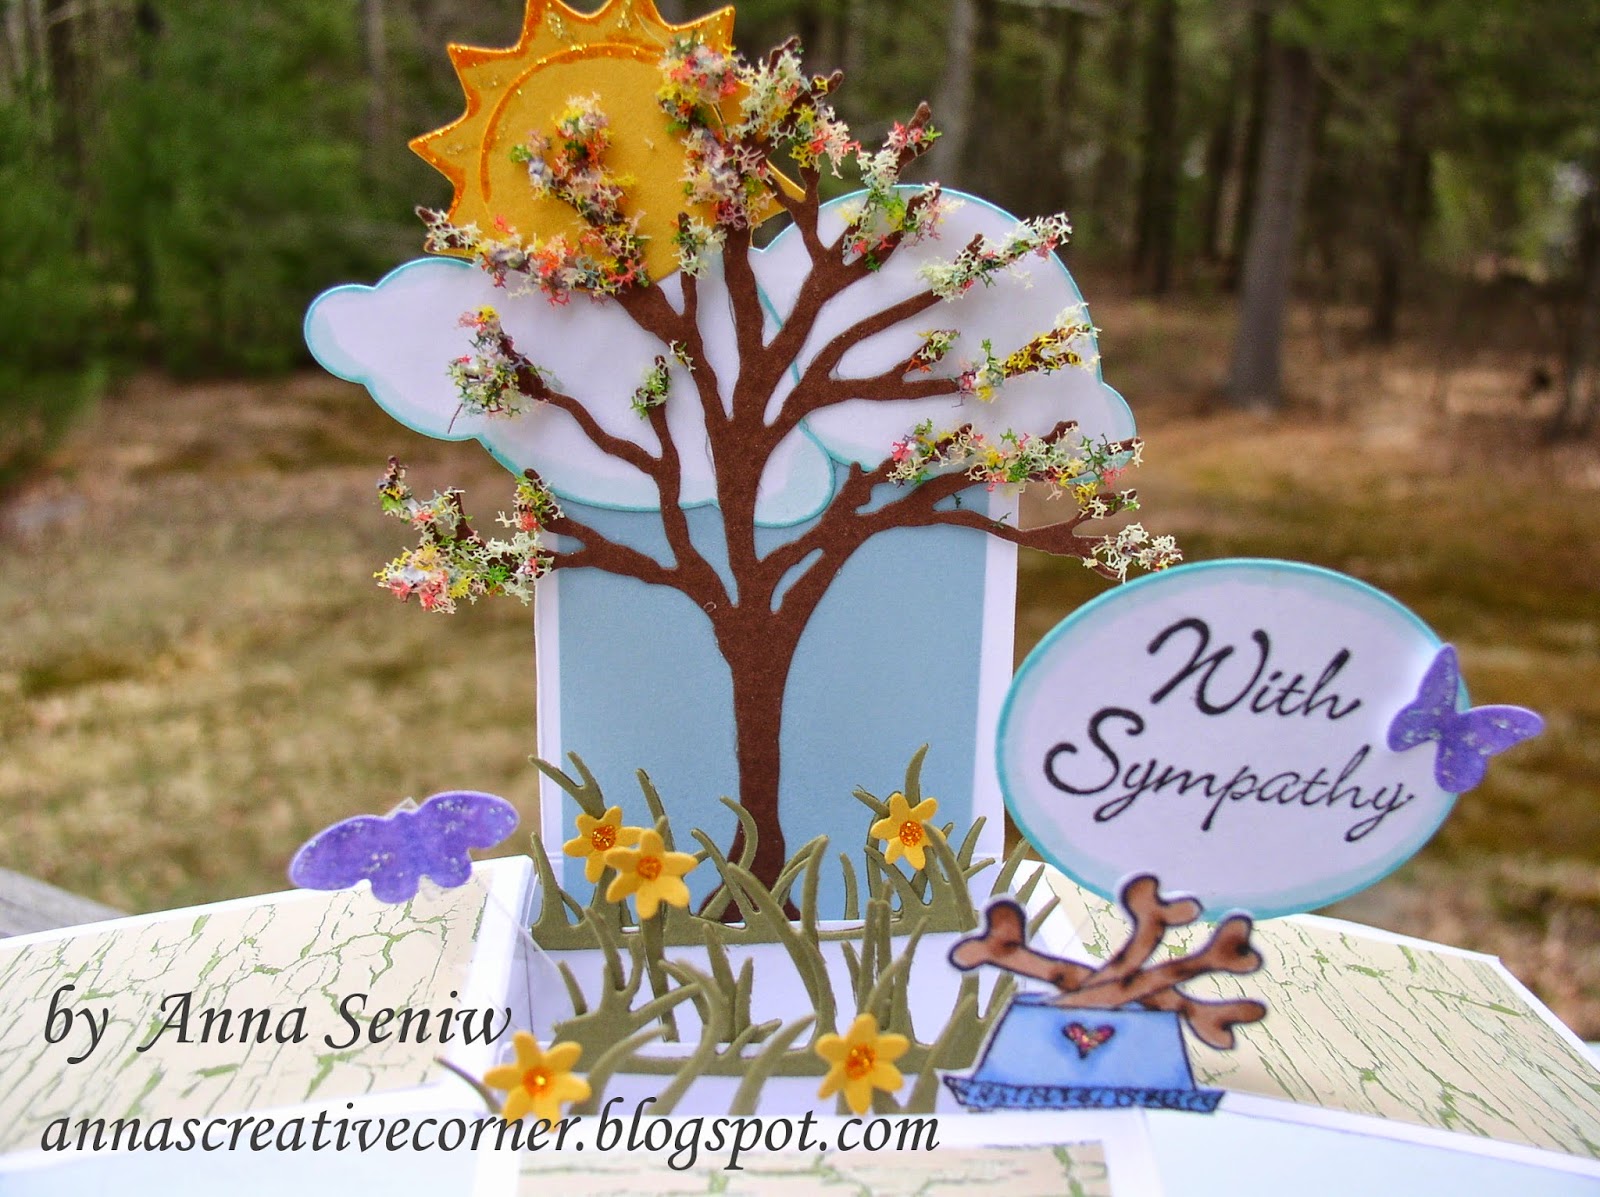
My good friend Maryanne lost her beloved dog recently and I wanted to create something special for her. I decided on a card in a box and presented it to her yesterday.  She was very surprised and so sweet by promising to display and keep this card by Teddy's urn.


I truly enjoyed making this scene in the box; it was a lot of fun picking the various components and watching it all come together.  These 3-D scenes are addicting!

If you are curious how to make these 3-D pop up cards in a box, please join us on Saturday, May 17 and create 2 such great cards!  These are so very popular now; don't miss out on the chance to learn how to create them!  Please call and reserve your seat today!  You will not be disappointed.

Supplies used:
Dies:  Impression Obsession bare tree, clouds, sun & moon set, butterfly set, & tiny flowers set
Cheery Lynn grass border, Spellbinders classic ovals and labels 4
Stamps: Impression Obsession sympathy sentiments cling set
Other:  Copic markers, Flower Soft, & stickles

Hope you have a wonderful weekend,
               ~Anna

Monday, April 7, 2014

Welcome Spring with a 3-D Pop up Card in a Box!

Good Monday Morning!
Saturday, we had a class where we made these 3-D Pop up cards in a box.  A fun time was had by all and thank you for making it such a huge success!  I truly had so much fun creating this spring themed sample.  And then I enjoyed seeing everyone putting their special artistic touches on their creations!


I will be submitting my creation in Impression Obsession's You are my Sunshine challenge.

Supplies:
Stamps:  Impression Obsession Blooming Spring B5423
Dies:  Impression Obsession's Bird House set DIE 156-H, Sun & Moon DIE 163-C, Clouds DIE 068-A, Small Bird set DIE154-A, Rabbit set DIE168-C,Butterfly set DIE 046-A, Cheery Lynn's Nesting Eggs
Other:  Stickles, Copics, acetate strips

If you missed learning how to make these neat cards, join us Saturday, April 12th for a repeat performance! Call and reserve your seat today.

Thanks for "stamping" by,
          ~Anna

Friday, January 31, 2014

Single Layer Valentine!

Surprise - this is the second post for the day!  I wanted to get another idea out for you!


This was another very quick card, yet I have to say it looks very pretty in real life since it sparkles  oh so much. 

Again, I used one of the latest dies from Impression Obsession and added several flowers to the flourishes, stamped the saying and added stickles to the center of the heart and along the flourishes.  The stickles really makes it pop and you forget that it is all on one layer.  Quick and easy and you get your card done in a reasonable amount of time (the little flowers slow you up a bit!)

Supplies:
Dies:  Impression Obsession heart flourish,  Impression Obsession hydrangea die set (for the little flowers)
Stamp:  Hero Arts
Other:  Stickles (diamond), Viva Decor pearl pen

Thanks for "stamping" by,
       ~Anna

Monday, November 25, 2013

Another Nature Themed Christmas Card

Good Morning Everyone!
This year it seems like everyone is using forests and deer in creating beautiful scenes for Christmas.  I did create a tag with birch trees and deer and you can see it HERE.  This time I used tiny cardinals and Dee's snow covered tree die to create the following scene:

I have to say, I really like the way it turned out and am truly enjoying creating these scenes.  It is so relaxing to play with the pieces and watch the scene develop.

And don't forget to decorate the inside of your card!


With this unusual Arctic cold snap with snow showers we are having, this card is just perfect!

Supplies used:
Dies:  Dee's Large snow covered tree, garland and mini stars
          Impression Obsession Birch trees and Merry Tree
Embossing folder:  Sizzix
Copic markers:  Cool grays, black, reds

Thank you for stopping by and keep warm!
                ~Anna

Tuesday, November 5, 2013

Another Simple Christmas Card

Happy Tuesday Everyone!

I created another Christmas card for you. Lately I have been drawn to this pretty gray card stock and tried it for this card. 

I added diamond stickles to the snowflake background and silver stickles to the center of the white poinsettia.  It makes the whole card sparkle and ready for Christmas!

Supplies used:
Dies:  Impression Obsession Merry Tree and Twig Wreath, Marianne Creatables Small Poinsettias
Embossing folder:  Sizzix
Other:  Stickles

Thanks so much for "stamping" by,
            ~Anna


Thursday, October 31, 2013

Poinsettias on a Christmas Tree

Hi Everyone!

Christmas is only a little more than 7 weeks away!!!  Time is just flying by and so I created another Christmas card for you!

Very simple but elegant.

And here is a close up of the flowers:


Supplies used:
Dies:  Dee's Distinctively Dies - Tress and set of mini stars, Impression Obsession "Hydrangea" set,  Spellbinders Romantic Rectangles, Anja card stand
Embossing folder: Sizzix
Other:  Gold stickles

Have you started your Christmas cards yet?

Looking forward to seeing your creations!  Please share them on our Facebook page!
Thanks!
              ~Anna

Wednesday, October 9, 2013

A Snowy Wintry Forest Scene

Tags, tags and another tag!  I had fun creating this wintry scene tag and the birch trees die and the deer trio from Impression Obsession were perfect for the task. 

I used distress ink and copics to add color and stickles put the finishing sparkly touch to the project!

Get into the fun and create some tags!
Have a wonderful day!
        ~Anna

Supplies used:
Dies:  Impression Obsession Birch trees (comes with 2 birds), Impression Obsession Deer trio
Embossing folder:  Sizzix
Copics:  Cool grays, browns, reds
Distress ink:  Antique linen
Other:  Nellie Snellen Duo punch of tiny flower & butterfly, stickles

Monday, September 23, 2013

Great use of Snowmen "Toppers"

Happy Fall!
Yes, fall came in yesterday and now time is just ticking away.  Have you started your Christmas projects yet?  I got these snowmen "toppers" in and they are not only gorgeous but so easy to use.  I made a tag and then used a different snowman topper to make a card. (Basically, take the tag and expand it onto a card!)


These toppers are simply great if you want to mass produce some tags or cards.  These snowmen are so cute, made of excellent card stock quality, already pre-cut for you and with gold foil and glitter!  You get 10 different snowmen in the package! 


Each snowman is package in an envelop with the 3 layering pieces!  You just take one envelope out and put the guys together.  (only 3 layers to build!)  Layer the completed snowman on a tag or continue making a card.  Soooooo simple and quick!  I know I will make 10 quick cards and have these guys ready for sending out in December!  And the whole package of 10 snowmen go for only $8.25!


And to see how nice and quick these are, come by on Saturday, September 28 and make a tag!!!  You are going to fall in love with these guys!


Yes, since it is now count down to Christmas making ideas, I will try to have as many Make and Takes for you!  Next Saturday,  October 5 will be a Pergamano Make and Take!!!  I'll post that tomorrow!

ALSO, on Saturday, October 5 at 1PM, we'll have the very popular, Tag You're It class!!!  Come and make several Christmas tags PLUS a tag for a wine bottle that you will be able to use for Thanksgiving!

Fall is here and the Creative Corner is here to help you make your holidays fun and creative!!!

See you real soon!
     ~Anna

Wednesday, April 17, 2013

Red Tulips in a Basket

I have been waiting patiently for these tulip dies and they arrived today, (yay!) with a bunch of other goodies (double yay!).  After doing the boring duties that had to get done, I got to sit and play! I've been thinking what color combination I was going to use and decided on red tulips.  They always look so rich.  I also decided to keep it simple with only cream and white for the background and the basket.


The background is a new embossing folder by Crafts Too called lattice.  I added the Cheery Lynn "Dancing Doily Lace" for accents below and above the basket.  And the sentiment was stamped on an Impression Obsession Tag Die.  (The tulips are by Marianne Creatables.)

.
 Here you can see a close up of the different layers and the texture created by the embossing folder.


And for the finishing touches, I added red stickles to the tulips and a bit of crystal stickles to the leaves and stems.

I must say, I am really pleased with the results!  The card is just so darn cute!

Stuck on what to make; check out these and other new dies and embossing folders at the Creative Corner.  Or sign up for the "Spring Flower Class" on Saturday.  Call and reserve your seat today.  You'll go home with lots of inspiration and flowers to give away for just about any occasion.

Looking forward to seeing you soon!
               ~Anna

Saturday, April 13, 2013

Pretty Pink Hydrangea

After completing the blue green hydrangea, I wanted to make a pink one.  This time I used Copic re-inkers to make my background paper.  (Copics are alcohol based and therefore you can use them just like other alcohol inks,)  I used RV10 and V12 and squirted a few drops on my felt covered block and decorated my glossy white card stock.

I used the Impression Obsession Hydrangea die set again, but this time I made a white on white card with only pink for the flowers and the bow.


I think everyone knows that I love flowers!  They just make me smile and feel great and therefore, I truly enjoy making paper flowers.  I hope you get inspired and try some flowers for your cards.  They make such a beautiful statement!

Thanks for stopping by,
      ~Anna


Monday, January 14, 2013

Another Acetate Card

I completed another acetate card, this time with an idea from Ginny.  When she came by last week to do the Make and Take, she decided to stamp the acetate in black.  Of course, we then had to change the backing paper to a lighter color so that the stamped image would stand out.  Here is my new card with the acetate stamped with black Staz on.

I used the same gorgeous flourish from Impression Obsession and layered it onto cream card stock that was stamped with the Hero Arts newspaper background stamp.  The rest was basically the same as the Make & Take card, which you can see HERE.

Have a wonderful day and see you soon,
               ~Anna

Friday, January 4, 2013

Happy New Year!

Happy New Year Everyone!

I can't believe that it is 2013.......all I can say is wow!  I remember when my dad told me when the world will celebrate the year 2000, there will be a huge party.  I asked why and he explained that it will no longer be 1900's.  As a kid, I just shrugged.  So, he suggested, "Why don't you figure out how old you will be in 2000".  And so I figured it out and nearly had a heart attack when I realized that I would be 45!!!  And now, here we are in 2013...........boy oh boy, how quickly time flies!

Which brings me to the fact that tomorrow is the first Saturday of the month.  And we know what that means; it's Make and Take Day!  I created a great little card for tomorrow using acetate, some Hero Arts printed paper and some punches!  Last month Shari Carroll created a great card and a video and I used her ideas to come up with this little gem!

I used an Impression Obsession flourish stamp and white Stazon ink to stamp the acetate.  I layered it onto the wonderful Hero Arts paper (from the Little Black Dress paper pad) and used punches to decorate the card with butterflies and flowers.  The finishing touches was with the Black Pearl Pen by Viva Decor and some stickles.

Here is a close up.  It was difficult to photograph this, since the flash would reflect on the acetate.  (And I don't have a place outdoors to photograph since there is still so much snow out there!)  I have to say that the card looks so much better in real life.

I am also excited to let you know that the new Hero Arts catalog is out and you can see it first hand at the Creative Corner!  Stop by and check it out and order some of their new goodies!!!  It will truly inspire you and get your creative mojo going!!!

Therefore, start off the new year with some fun and creativity and join us for this fabulous Make and Take!
Looking forward to seeing you!
            ~Anna