Showing posts with label Marianne Creatables. Show all posts

Friday, May 26, 2017

Oh, the Ever So Cute Japanese Paper Dolls

I have been having a ball with these new dies from Frantic Stamper called, Kokeshi Japanese Paper Dolls die set. They are just so cute!!! And what's neat is that you can cut out 6 different hair styles with ONE pass of your die cutting machine! I do wish it had more "body" dies, but I did get around that.  Since the die is not detailed at all, I ran two pieces of card stock with the die and therefore got double the amount of base bodies as opposed to only using one piece of card stock.

Here is what I came up with:


And here are a bunch of dolls that I just put together. I had so much fun watching them "grow" and choosing the varies hair styles as well as the different color kimonos. With these dolls, I will be ready to put a card together in just about no time.

And let me show you what the background card stock looks like when I cut out all the pieces.  I used Cosmic Shimmer Pixie Powders to create the backgrounds.  It is very simple to use these powders; just sprinkle on the card stock and mist it with water.  The result is a beautiful shimmery watercolor background! The MICA is these powders is what gives it the shimmery shine which is perfect for this project making the kimonos look like real satin!


Hope you get inspired and start playing with these Pixie Powders.

Have a wonderful Memorial Day Weekend,
Anna

Supplies Used:

Dies:  Frantic Stamper Japanese Dolls, Spellbinders Nesting Scalloped and regular rectangles, Impression Obsession small tags, Marianne Creatables Butterflies set
Other: Cosmic Shimmer Pixie Powders

Wednesday, September 7, 2016

Beautiful Ukrainian Poppy!

Happy Wednesday All,

It's hump day and a short work week! Yay!!!

Today I would like to share with you a poppy flower card.  Now, being Ukrainian, I was thrilled when Sue Wilson came out with the Exquisite Poppy die set; because every Ukrainian needs EVERYTHING poppies!  I myself have a large embroidered framed poppies piece (38" X 18"), silk poppies in an Ukrainian vase and even a painting of poppies! I was so excited about being able to make poppy cards now!!!

I started cutting the flowers and was not pleased at all with the way they looked. They just did not look like poppies. I tried red card stock, then white card stock. Tried molding them on my mat, and still they didn't look like poppies. I just couldn't figure out what was wrong. I was so discouraged.

I couldn't sleep because of my dilema until I thought of doing a search on youtube! I was so hoping that Sue Wilson used them in a video. And sure enough she did!  She created a beautiful card showcasing 3 poppies.  You can see the card and video HERE.

Sue's tip on cutting the poppies did the trick!!! She used crepe paper!!! Of course! It made the flower realistic and lightweight!  I couldn't wait to get to the Dollar Store the next day to get some crepe paper streamers!!!  And here is my card; the crepe paper made ALL the difference.


I'm very pleased with the way it turned out! And it's perfect for ANY occasion! 

Supplies used:

Dies:   Sue Wilson Exquisite Poppy set, Sue Wilson Olive branches, Marianne Creatables Flower filler
           Impression Obsession Rectangle 6 in 1 frame
Embossing folder:  Sizzix


The lesson here --- the right paper goes a long way!!!

Thanks so much for "stamping" by,
           ~Anna

Wednesday, August 31, 2016

Simple Birthday Cupcakes

Happy Wednesday!

Here are two birthday cards I made over this past weekend.  And literally, the stickles was drying on the second card while I jumped into the shower to get ready for the 50th party I was going to!!! LOL


I needed to make the card for a friend's 50th birthday and I thought that I was finally going to use my "tool" dies, BUT that didn't happen. The week flew by and I didn't even start with pulling the colors together. So, on Friday I decided to make a cupcake card after a browsed Pinterest over the past few days. Next our Matushka left me a message and was hoping that a had an extra card lying around for our Bishop's birthday!  I had to laugh..........as everyone knows that I have A LOT of sample cards, but not to use. Just like the shoemaker's kids not having shoes, I'm the card maker with no cards! LOL.   But I couldn't say no, I mean it was for the Bishop and I truly felt honored that Matushka thought of me. So, I told her that I did have pieces cut for a birthday card that only needed to be put together. Or since I was planning to make Bill's card in the morning, and if I liked the way it was developing, I would make another card at the same time.

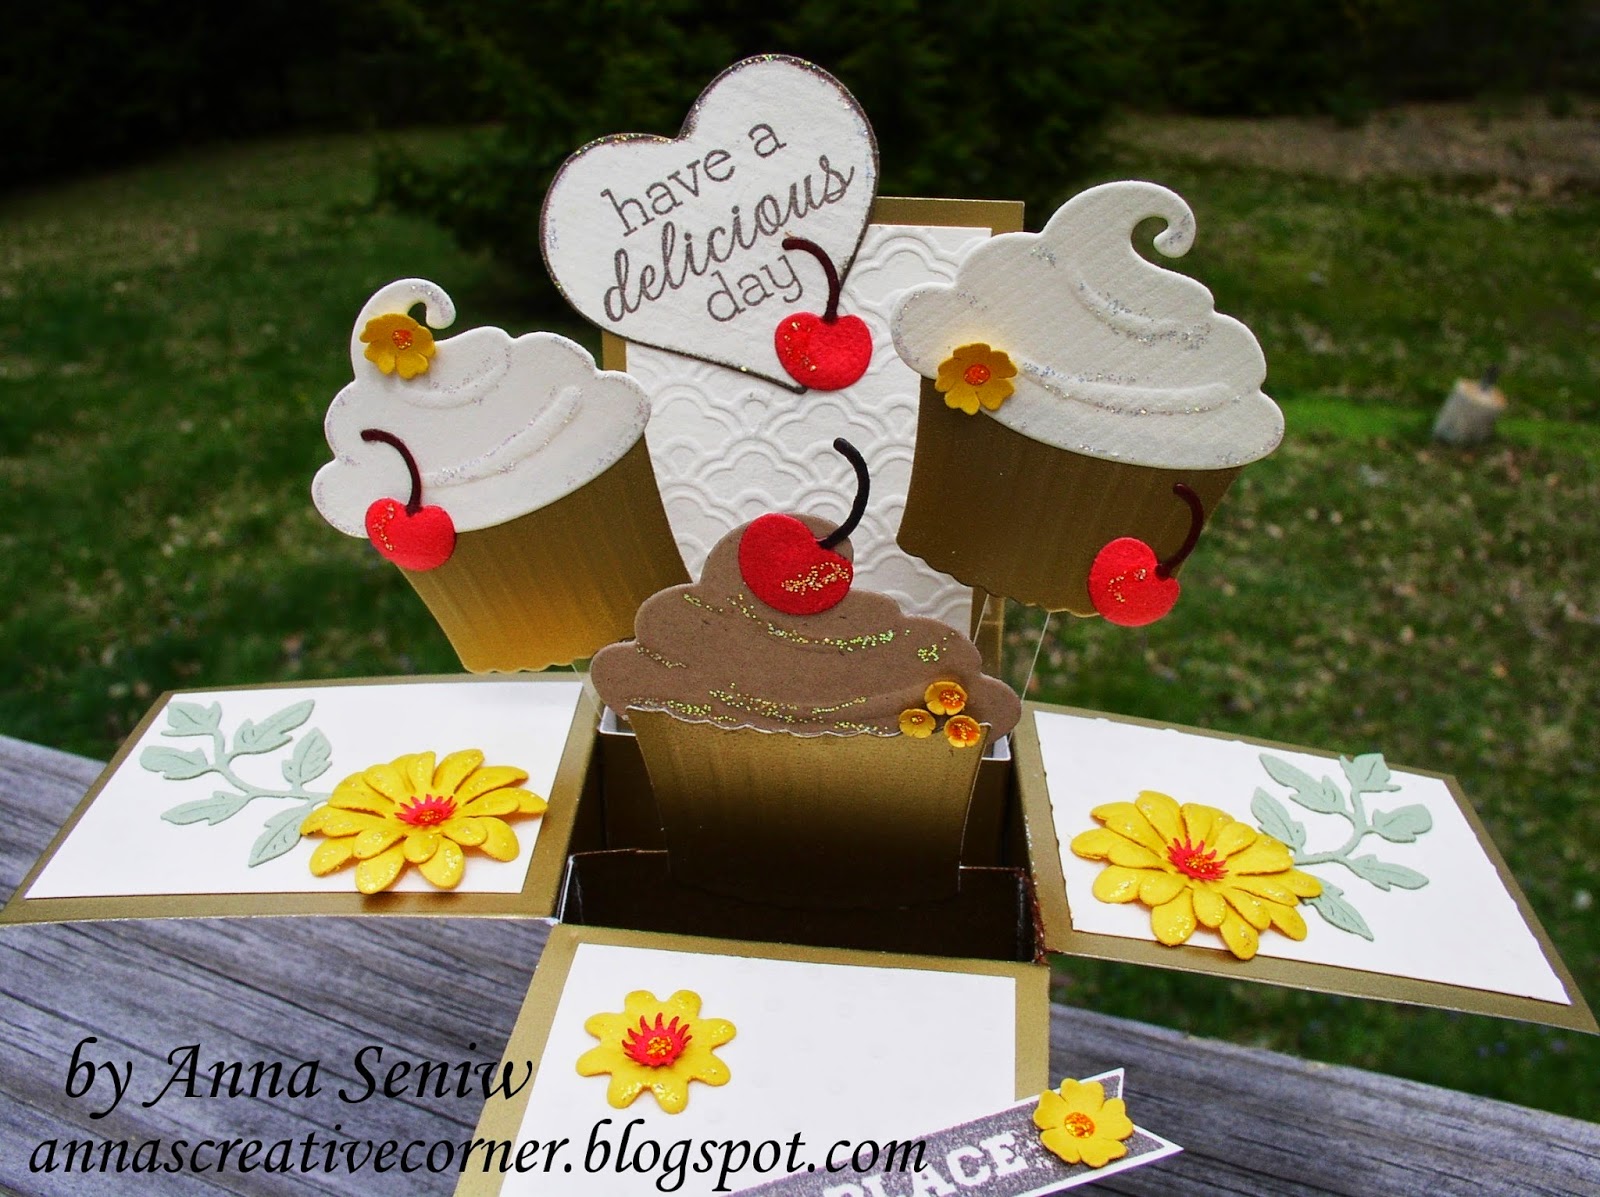
Well, as you can see, I ended up making two cupcake cards! I would have loved to have made a more elaborate card for the Bishop, plus at least a 5X7 card, so that it would be big enough for everyone to sign, BUT time just didn't let that happen.

As I was creating the card, I really liked it; it is so cute!  Matushka loved it and I was very thankful!


Here are close ups; you can see the detail of the embossing folder.  


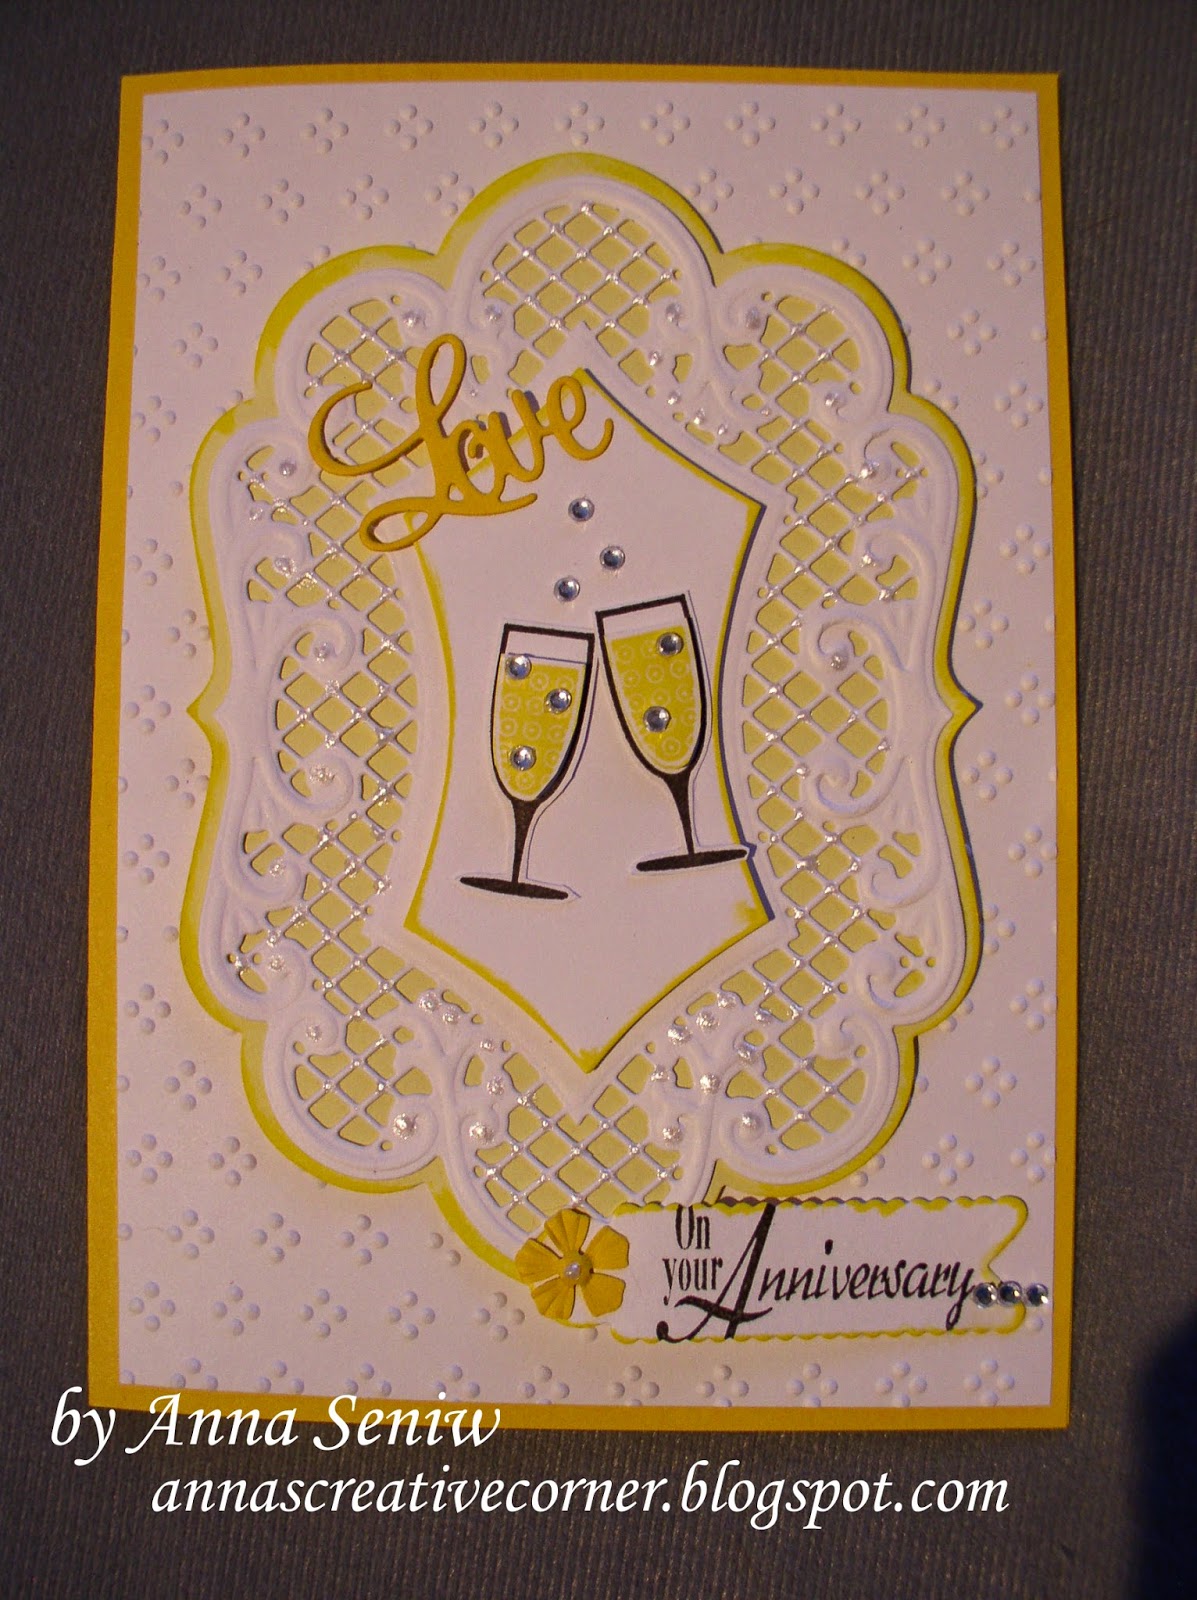
As you know, I'm so in love with the teal color combo. Also, notice that I only used strips of teal card stock underneath the saying; a great way to save on colored card stock! 
 
Lastly, the bit of stickles on the frosting and candle was just enough to make everything pop!
 
I know I will be using this layout again; it's simple, cute and pretty fast! You can make several of these pretty quickly!
 
 
Supplies used:
 
     Dies:      Marianne Creatables Cupcake die (it includes the candle and two different cupcake frostings)
     Embossing folder:     Cuttlebug Birthday Sayings
     Stamps:    Hero Arts Birthday sayings clear set
     Other:      Stickles and gems
 
 
Thanks so much for "stamping" by!
               ~Anna


Monday, July 20, 2015

Birthday Cupcakes!

Hi All,  Hope you are enjoying your summer.  We've past the half way point of July :(  Boy where does the time fly?

I'd like to share with you a birthday card I made for my daughter, Maria, who loves a good cupcake.


It's a simple layout, yet it focused on the happiness of cupcakes.  I also got to use one of the new border dies from Tattered Lace, which was included in their #17 magazine.

Supplies used:
Dies:  Marianne Creatables Cupcakes die, Tattered Lace lacey border die
Stamps:  Impression Obsession "It's a cupcake kind of day"
Other:  Tattered Lace Ditsy Dots embossing folder
Card size:  4" X 8"

Thanks for "stamping" by,
             ~Anna

Wednesday, July 1, 2015

Awesome Flower Tags! and a Baby One too!

Happy July !!!  Due to popular demand, we will be repeating the Flower Tags Workshop this Sunday, July 5th, at 1:30pm.  (Don't worry, this should give everyone enough time to attend church before class.)


You'll make these 4 fabulous tags PLUS this very cute giraffe tag!!!!


Tags are so versatile, especially when you seem to run out of time to make a card!!! LOL And it always seems to happen to me!!!
I therefore, just added the orchid tag to the gift bag and look how it saved the day!!!


Supplies used:
Dies:   Orchid and Love dies by Dee's Distinctively Dies, Spellbinders Romantic Rectangles, Impression Obsession Mini Tags, Small Picket Fence and Mini Solid Butterflies, Pansy flower by Leane Creatief, Sunflower by Marianne Creatables, Cheery Lynn's Chrysanthemum and leaf flourish
Stamps:   Impression Obsession, Lawn Fawn and Outlines

Thanks so much for "stamping" by,
                ~Anna

Monday, June 29, 2015

Axios!

Last month our new parish priest graduated from seminary and our bishop also made Fr. Gregory's appointment to our parish permanent!  Everyone was very happy and in honor of the occasion, I made a special card for Father Gregory and Matushka Kathy.


I used all dies on the card and "Axios" was computer generated.  I really like the beautiful cross die by Die Versions.

By the way, the meaning of the Greek word Axios is an acclamation of faith. Adopted by the early Eastern Orthodox church, it is made by the faithful at the ordination of bishops, priests and deacons.


Supplies Used:
Dies:   Cross - Die Versions, Cherry Blossoms - Cheery Lynn, Stem flourish and Pretty oval - Marianne Creatables, Large square lattice - Nellie Snellen
Punches:   Mini flower/butterfly set - Nellie Snellen
Other:  Peel off circle ruby gems, Viva Decor pearl pen and Stickles

Thank you so much for stopping by,
                 ~Anna

Thursday, March 12, 2015

Anja Large Oval Die and Two Cards

Happy Day Everyone!

Today I want to share with you two cards I made recently using the same Anja background die.  One card was an anniversary card for Maria & Gary (Can you believe that the kids celebrated their One Year Anniversary already?!?  Sometimes it feels like it was just yesterday we were all celebrating in sunny Barbados.  Would have loved to have been there this horrendous winter.)  OK, I guess I'm going off on a tangent -- so back to the cards --- The second card was a card for a baby shower that a friend had asked me to make for her.  And so here are the cards...


The layouts are pretty much self explanatory and I have to say the cards look very elegant.  Also, you can see I used Dee's "Love" die on both cards.

Supplies used:
Dies:   Anja's Large Oval, Dee's "Love" word die, Marianne's Baby carriage and baby pins, Impression Obsession Tags
Stamps:   Impression Obsession "On Your Anniversary", Stampin' Up "Happy Hour"
Punches:  Nellie Snellen flower punch and embosser, Marvy heart punch
Embossing folder:  Tattered Lace Itsy bitsy embossing folder
Other:  Viva Decor pearl pens, Stick on crystals for bling

Hope you're enjoying the wonderful spring weather!
And thanks so much for "stamping" by,
                     ~Anna

Thursday, February 26, 2015

Go Yankees!

Today is the first day of spring training for the Mets and the Yankees!  This can only mean that spring is just around the corner!!!  And hopefully warmer weather!!! We so need it!

In honor of spring training, here is a fabulous box card that Cecilia Prange made for Soni last year.  I finally came around to post it!  Sorry Ceci that it took so ling and that this post got away from me. 

Now, if you know Soni, you know that she is an avid Yankees fan and just loved this surprise box card that she was able to display through the entire baseball season!


Ceci gave us some tips: she went to the Party Store and was able to get Yankee themed wrapping paper and some other goodies to fill the box.  (The wrapping paper was very economical with lots of pictures that she was able to cut out and use.)

Here are some more views:


Ceci also used some Cheery Lynn dies as well as Marianne, Joy, and HeroArts dies, and even some punches.  It's a birthday gift in itself!

Now I know what I'll create for my brother for his birthday!  Though it will be Mets themed!  Go Mets!

Thanks for stopping by and have a great day!
                ~Anna

Sunday, February 22, 2015

One Die, Two Looks

Happy Sunday!  And it is finally sunny and quite warm (high 30's) after being in the negative digits!!!  As I say each day, we're ONE day closer to spring!!!

Today I want to show you two cards I completed with the same border die.


This card was inspired by Kittie Caracciolo.  You can see the card she made HERE.  I just love her work and when I saw the card she made with this border die (Sue Wilson's French collection border and tag set), I just had to get the die set!

I tried several flowers and they just didn't work.  Then I came across this Cheery Lynn Frangipani flower die, and I imagined that it should work.  I also love this flower because it reminds me of my many happy times in Barbados!  After I finished the card and looked on line at the flower again, I realized that I should have curled it a bit differently.  I will try improving the look of this flower in the next card I make.  But all in all, I like the look of this card - it just makes me smile and feel happy!  Hope it does that for you too.


The second card was inspired by Sue Wilson herself.  I watched a video where she demonstrated using not only the border but the card stock that is left behind.  I liked the look and tried it out here.  I added micro fine "cool highlights" glitter to the background of the card and it truly gives it a nice sparkle.  I even created a border by piercing the layered card stock; also a favorite detail of Sue Wilson. 

Supplies Used:
Dies:  Creative Expressions Sue Wilson French Collection border, corner and tag die set and Vinery Petite set,  Cheery Lynn Frangipani flower set, baby's breath set and Chrysanthemums, Dee's Distinctively With Love words, Marianne's open flower and leaf
Other:  Micro glitter ritz in cool highlights, Viva Decor pearl pen, Copic markers

Spring is on it's way and we can even see it in our card creations!
Have a wonderful day!
          ~Anna

Sunday, June 29, 2014

Simple Birthday Card

Good Morning fellow crafters!  I finished a simple birthday card several days ago and now I can post it.

 I love white on white cards, but here I wanted to add a very pretty teal accent and of course some diamond stickles sparingly throughout the background;  very simple, didn't take too much time and yet very pretty.

Supplies used:
Dies:    Marianne Creatables garden branch and Anja card stand, Cheery Lynn butterfly and flowers from the  baby's breath set, Impression Obsession tiny flowers, Spellbinders labels 18
Stamp:  Hero Arts
Ink:      Brilliance pearlescent jade

Thanks so much for "stamping" by,
               ~Anna

Tuesday, May 13, 2014

Cupcakes Galore

Yay cupcakes!  I don't think that there is anyone out there who doesn't like cupcakes!  And of course I decided to make a pop up card in a box with cupcakes and cherries!

I used gold, chocolate and cream colored card stock (it may look white, but it's cream for vanilla) to make the cupcakes.  The Marianne Creatable cupcake die set includes a cherry, a candle and a flower die; perfect for decorating the yummy snacks.


I decided to use the saying, "My Happy Place" - perfect for any occasion.  I have to laugh because when I think of the saying, "go to your happy place", I think of the movie, Happy Gilmore!  LOL!   I believe that cupcakes can be a happy place for many!

Supplies used:
Dies:  Marianne Creatables cupcakes set
            Nellie Snellen multi frame heart dies MFD 022
           Joy Crafts daisy set
           Cheery Lynn - flourish leaf strip, baby's breath flower kit
Stamps:  Hero Arts

Thanks for "stamping" by
    and I hope you're enjoying the nice weather we're finally having!
                                                ~Anna

Wednesday, May 7, 2014

Elegant Birthday Card

Happy Wednesday!

Just a quick share of an elegant birthday card I created for a friend recently.  It is a simple design with the new Anja border die set; cut twice, once on top and then on the bottom. 


This is a really pretty die and can be used lots of ways.  I am sure you will also find it versatile.

Supplies used:
Dies:  Marianne Creatbles Anja Border die set, Spellbinders Labels 4
Stamps:  Serendipity
Other:  Viva Decor pearl pens

Thanks so much for "stamping" by
      and have a wonderful day!
               ~Anna

Sunday, April 20, 2014

Saturday, April 19, 2014

Beautiful Easter Cards Made by Soni Larson Using the Easter "Toppers"!

Thank you Soni for the samples you sent me of the wonderful Easter cards you made using the easy, pre-cut Easter toppers.  What a beautiful job!


Thanks again for sharing Soni!

(And if you'd like to see how we used the snowmen toppers, you can see them HERE.)

Thanks so much for "stamping" by,
            ~Anna

Wednesday, November 20, 2013

A Different Use of Corner Dies

Hello Everyone!
I came across a great idea that I wanted to share with you!  Use your corner dies to embellish other things than just corners!

 Above, are the corner die cuts from the new Anja vintage corner set and a tag from another Anja set that many of you already have!

 Now, place the corners on the tag and you have a fabulous new tag! 

Stamp a sentiment on the inside and what a pretty look! 

You can even cut the corners from a different color card stock to get another look!  You can place these tags on the front of your card, or spiffy up the inside! Use them horizontally or vertically.

And for something different, the corner in the picture directly above, even looks like a butterfly!

Time to think outside of the box...............you will find that the possibilities are endless!  I love it when I can use my supplies in various ways!  I'm sure you do too!

Supplies used:

Dies:  Anja's large oval, Anja's vintage corners

Thanks for "stamping" by,
           ~Anna

Tuesday, November 5, 2013

Another Simple Christmas Card

Happy Tuesday Everyone!

I created another Christmas card for you. Lately I have been drawn to this pretty gray card stock and tried it for this card. 

I added diamond stickles to the snowflake background and silver stickles to the center of the white poinsettia.  It makes the whole card sparkle and ready for Christmas!

Supplies used:
Dies:  Impression Obsession Merry Tree and Twig Wreath, Marianne Creatables Small Poinsettias
Embossing folder:  Sizzix
Other:  Stickles

Thanks so much for "stamping" by,
            ~Anna


Thursday, October 31, 2013

Poinsettias on a Christmas Tree

Hi Everyone!

Christmas is only a little more than 7 weeks away!!!  Time is just flying by and so I created another Christmas card for you!

Very simple but elegant.

And here is a close up of the flowers:


Supplies used:
Dies:  Dee's Distinctively Dies - Tress and set of mini stars, Impression Obsession "Hydrangea" set,  Spellbinders Romantic Rectangles, Anja card stand
Embossing folder: Sizzix
Other:  Gold stickles

Have you started your Christmas cards yet?

Looking forward to seeing your creations!  Please share them on our Facebook page!
Thanks!
              ~Anna

Wednesday, September 18, 2013

Glittery Christmas Tag

Happy Wednesday!
Today, I want to share a Christmas tag I made with micro fine glitter and Dee's stacking tree dies. 

It is so simple, yet so sparkly and perfect to dress up any gift under the tree. 

I also want you to notice the small star on top of the tree........it's a new die cut from Dee.  What is great about it is that you get so many stars on the die plate, so that when you run it once through your machine, you have enough for lots of cards or tags!

Which brings me to the point that several of you have asked that I hold a Christmas tag class.  It is in the works!  I am working and designing several tags which you will make in that class and be ready to dress up your presents.  OR, you can take the design and expand it onto a card.  Keep a look out for the dates........I will post them this week.  Time is flying by, the air is getting cooler and we need to start our fall project now!  Keep in touch!

Thanks for "stamping" by,
            ~Anna

Wednesday, September 11, 2013

Another Christmas Wreath Card!

I know, another wreath card.........but I wanted to show you the different looks that you can get from basically the same supplies.  In this Christmas card, I was going for the "Winter Wonderland" look of white on white with just a little bit of neutral  color.

Again, I used Impression Obsession's Twig Wreath die set.  To get sparkle on the card, I used Shimmer Spritz on the Joy tag and the three layers of the poinsettia.  Unfortunately, you really can't see the sparkle in the photo, though here is a close up:


Supplies used:
Stamp - Impression Obsession
Dies - Impression Obsession Twig Wreath, Cheery Lynn Holly leaves and Flourish leaf strip, Marianne Large and small poinsettias, Spellbinders Labels 4
Other - Swarovski crystals, Shimmer Spritz in Sparkle, Swiss dots embossing folder

This is the third card that we will be making in the "Wreath Cards" class this Saturday!  There still is room available to join us for this fun class........just call to reserve your seat!

Thanks for "stamping" by,
      ~Anna

Friday, September 6, 2013

Christmas Wreath Card

Today I am posting the new card I made with Impression Obsession's wreath die.  This time I used a Christmas theme.  It was a lot of fun choosing the poinsettias, the various layering papers and arranging the layout. 

(I am also now thinking of a different color scheme for a different look.  So check back to see how that one will come out!)


Hope you'll join us for this fun workshop and start your collection of fall and winter cards!

Supplies used:
Stamps:  Impression Obsession
Dies:  Cheery Lynn holly leaves, Cheery Lynn pine branches, Marianne small poinsettias, Impression Obsession twig wreath set, Impression Obsession small tags

Thanks for "stamping" by,
           ~Anna