Hello Everyone,
I want to thank the wonderful ladies for coming out to my class yesterday. We had a very fun and productive afternoon! The following is the third card that we made in class.
The scribbled roses are so popular and made by many companies now. When I first saw them, I thought they were just ok. Then I started seeing samples all over Pinterest and they started to grow on me to the point where I ordered the set from the Frantic Stamper and had to try them out.
I've also noticed that the color combo of gold, black and white is very popular now and so I tried it out. When I think of these colors, I think of an elegant evening dress and I think it came across in this design.
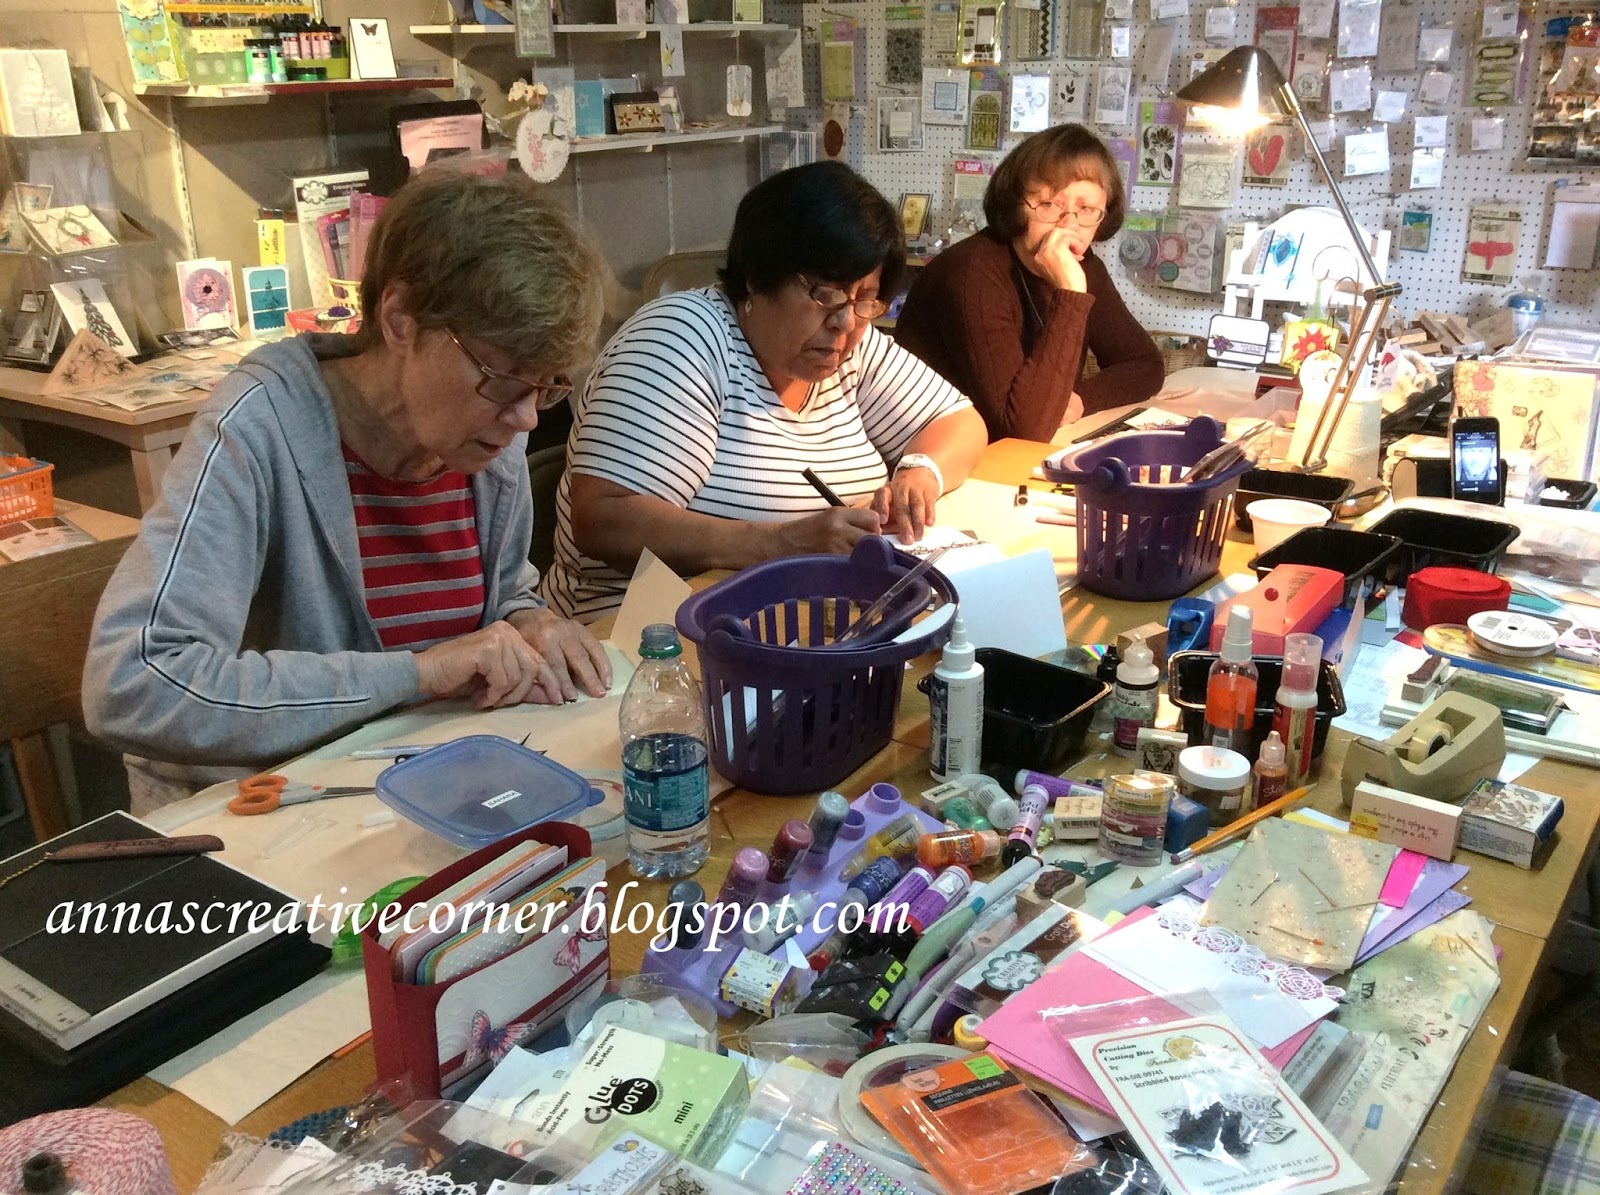
Here are some pictures of the ladies working diligently on their works of art. You can almost see the smoke coming out of their brains! But believe me, we also had quite a few laughs during the afternoon! I also want to take the time and thank Ginny for helping with the cutting for the class. She cut all the black roses! Thanks again Ginny! You saved me so much time!!!
And here is a picture of all three cards that were made in class!
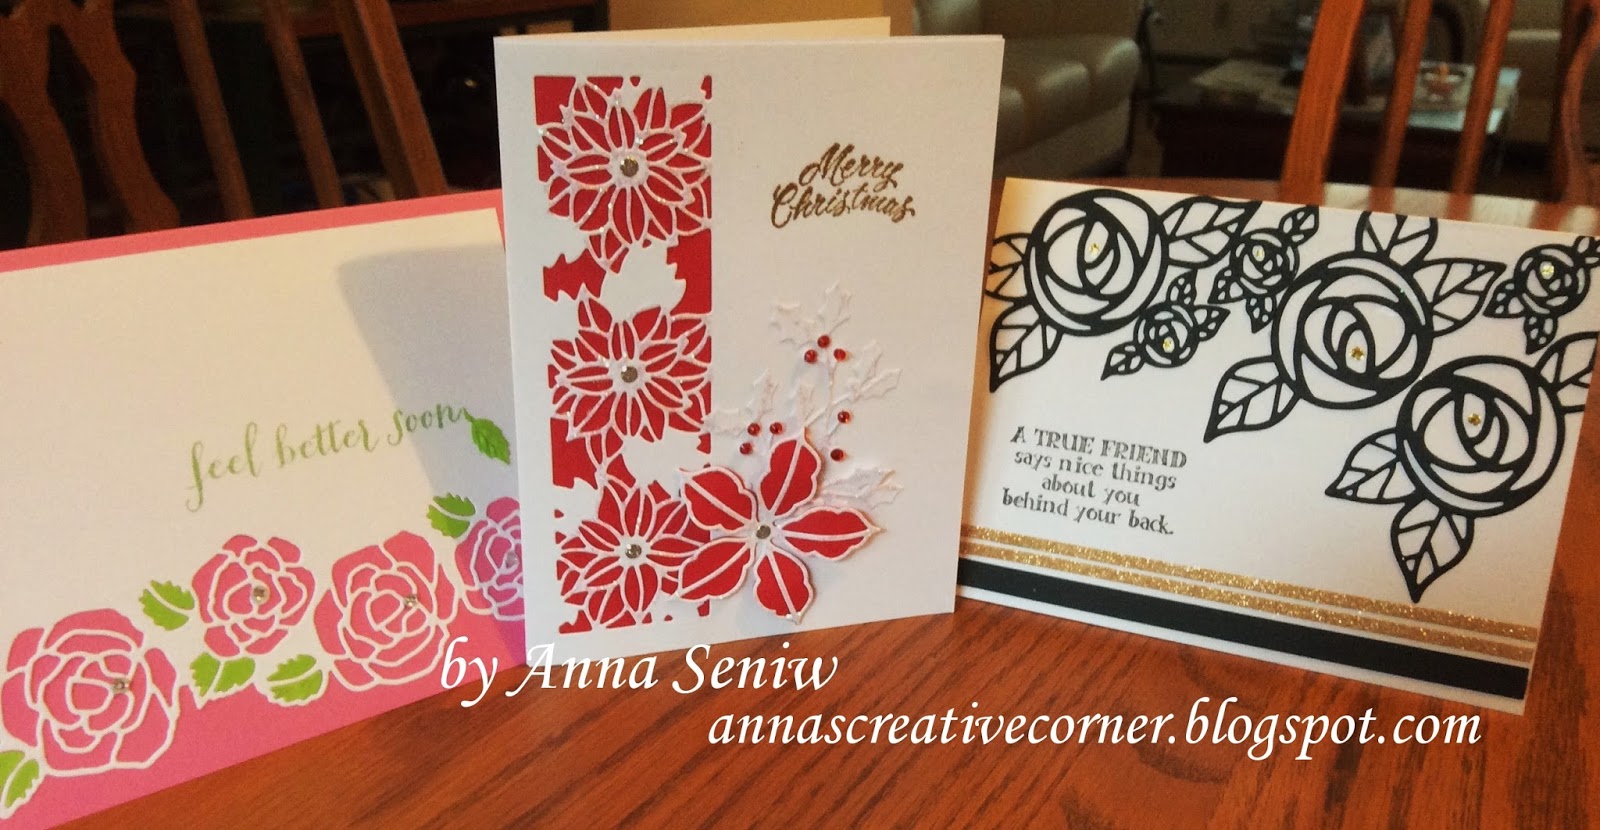
You can read more about the rose border card HERE. And details about the poinsettia card is HERE
Hope you're having a fabulous day and I look forward to seeing you in my next class!
~Anna
Supplies used for Scribbled Roses card:
Dies: Frantic Stamper Scribbled Roses
Stamps: Impression Obsession True Friend
Other: Micro fine glitter in sahara, Gold stickles
.
Showing posts with label Micro fine glitter. Show all posts
Sunday, September 18, 2016
Monday, June 3, 2013
Make a Wish with Glittery Candles
Els. owner of Elizabeth Crafts has designed and released her new dies and I just got them in. They are so much fun and here is a card I made for Maria's birthday.
The bow is actually from the "presents" die set, which is a set of different presents, similar to the candles. This way you can make all different color boxes and layer them on the solid present, or in this case, a solid candle.
And using the glitter really makes this card sparkle!
Thanks for "stamping" by,
~Anna
The bow is actually from the "presents" die set, which is a set of different presents, similar to the candles. This way you can make all different color boxes and layer them on the solid present, or in this case, a solid candle.
And using the glitter really makes this card sparkle!
Thanks for "stamping" by,
~Anna
Thursday, February 14, 2013
Beautiful Chrysanthemum Die
I received the new Hero Arts "Chrysanthemum" die and had to try it out. Here are two different looks from the one die. I used micro fine glitter for both cards and it made it very sparkly.
I am working on another card for a third look. It is always fun to create different looks from the same supplies.
Stop by soon to see more new cards and new product from Hero Arts and Ecstasy Crafts.
Thanks and looking forward to seeing you soon!
~Anna
I am working on another card for a third look. It is always fun to create different looks from the same supplies.
Stop by soon to see more new cards and new product from Hero Arts and Ecstasy Crafts.
Thanks and looking forward to seeing you soon!
~Anna
Friday, November 16, 2012
Lavender Christmas Trees!
Yes, I said lavender and don't they just great; all sparkly and waiting to be attached to your gifts or hung on a tree?
Christmas tags do not always have to be traditional colors. Try something different and have some fun! We have lots of Elizabeth Crafts glitter available in all sorts of colors for you to try your hand at this!
Stop by and pick yours up today!
~Anna
Christmas tags do not always have to be traditional colors. Try something different and have some fun! We have lots of Elizabeth Crafts glitter available in all sorts of colors for you to try your hand at this!
Stop by and pick yours up today!
~Anna
Friday, August 24, 2012
Beautiful Wedding Card using Outlines Stamp
I wanted to share with you this beautiful card that Ginny made some time ago. It is still as stunning as when I saw it that day!
Ginny used the wonderful Outlines stamp and dressed it up with beautiful textured card stock, flowers, flat pearls, and glitter! Isn't it simply gorgeous?
This is the stamp she used and presently there are still two of these in stock at the Creative Corner. Pick it up now, because once they are gone, they will be gone for good! (Outlines is no longer in business)
And this stamp is still in stock and would make another lovely wedding card!
Have a wonderful day
and
See you soon,
~Anna
Ginny used the wonderful Outlines stamp and dressed it up with beautiful textured card stock, flowers, flat pearls, and glitter! Isn't it simply gorgeous?
This is the stamp she used and presently there are still two of these in stock at the Creative Corner. Pick it up now, because once they are gone, they will be gone for good! (Outlines is no longer in business)
And this stamp is still in stock and would make another lovely wedding card!
Have a wonderful day
and
See you soon,
~Anna
Wednesday, August 22, 2012
Happy Engagement Card!
I have been bursting with news and now I can finally post it!!! My daughter, Maria and her boyfriend Gary are now engaged!!! I'm so happy for them.
About two weeks ago, Gary called me and asked for my blessing. And of course I said yes. "My goodness", I said, "I consider you my son already!"
I then asked for some details and he told me that he was planning to pop the question when they would be vacationing at Myrtle Beach. I asked about the ring and he explained that he got it already, all by himself. He knew Maria wanted an emerald cut diamond; therefore he chose two smaller stones surrounding the main one. I right away had to think of a card design. I remembered that a long time ago I saved a sample of an engagement ring card from the internet, in the hopes that one day, I could make one for her!.......................And here is what I came up with.
It would have been easier to create a round solitaire stone, but as usual, Maria likes to be different, and I had to improvise.
Below you can see the different parts of the round solitaire ring. I used Spellbinders Classic Circles Nestabilities to create the ring and then just cut some strips to the setting. Lastly, I used the silver, Elizabeth Crafts micro fine glitter for the stone. It really sparkles!
Now, Shannon saw the card and suggested that you can use this design for someone's birthday and make the stone the color of the birth month. She is thinking of using ruby glitter to make a nice ruby ring! What a great idea!
Now the wedding plans can begin!.........I found this on Pinterest.............and I asked Maria if I should start making these? You know me, I would need to decorate it.......maybe some hand made paper flowers for Mrs. Right and some golf clubs and tee flags for Mr. Right. Don't you think it would be just perfect???????
Thanks so much for "stamping" by,
~Anna
About two weeks ago, Gary called me and asked for my blessing. And of course I said yes. "My goodness", I said, "I consider you my son already!"
I then asked for some details and he told me that he was planning to pop the question when they would be vacationing at Myrtle Beach. I asked about the ring and he explained that he got it already, all by himself. He knew Maria wanted an emerald cut diamond; therefore he chose two smaller stones surrounding the main one. I right away had to think of a card design. I remembered that a long time ago I saved a sample of an engagement ring card from the internet, in the hopes that one day, I could make one for her!.......................And here is what I came up with.
It would have been easier to create a round solitaire stone, but as usual, Maria likes to be different, and I had to improvise.
Below you can see the different parts of the round solitaire ring. I used Spellbinders Classic Circles Nestabilities to create the ring and then just cut some strips to the setting. Lastly, I used the silver, Elizabeth Crafts micro fine glitter for the stone. It really sparkles!
I saved this before the days of Pinterest, so I don't know who originally posted this. But this shows you how simple it is to create a ring!
Now, Shannon saw the card and suggested that you can use this design for someone's birthday and make the stone the color of the birth month. She is thinking of using ruby glitter to make a nice ruby ring! What a great idea!
Now the wedding plans can begin!.........I found this on Pinterest.............and I asked Maria if I should start making these? You know me, I would need to decorate it.......maybe some hand made paper flowers for Mrs. Right and some golf clubs and tee flags for Mr. Right. Don't you think it would be just perfect???????
Thanks so much for "stamping" by,
~Anna
Wednesday, June 20, 2012
Beautiful Hummingbirds!
Today I wanted to show you the great pictures I was able to snap a few days ago!
First off, I have to tell you about this wonderful hummingbird feeder I got when I was in Belleville, Ontario. It was from this great little shop called, A Place to Perch. The owner was so knowledgeable and friendly and she told us about this simple red feeder. Soni and I both bought one, as well as the nectar and a "waspinator". The hummingbirds find this feeder easy to use and even like to perch on the little rail. There also is a moat in the center to prevent ants from getting into the nectar.
Sure enough, hummingbirds came to my feeder within a day of me hanging it up! I've had a different feeder years ago, but I haven't seen as many hummingbirds as I do now! Birds come to this feeder all day long. It is so exciting to see these little colorful birds fly over and take a drink. It just puts a big smile on my face.
I then became determined to snap a picture of these beautiful birds. It's not as simple as you may think. These birds are so fast. You have to be ready with your camera at a moments notice. I would sit out on my deck, but no birds in sight. But I didn't give up. I was determined and was hoping that by the end of the season, I would have a picture or two.
Last week when I was out on my deck taking pictures of the "round wall hanging", I turned around when I heard the humming. And since I already had my camera in hand, I was able to snap a few pictures!!!
First off, I have to tell you about this wonderful hummingbird feeder I got when I was in Belleville, Ontario. It was from this great little shop called, A Place to Perch. The owner was so knowledgeable and friendly and she told us about this simple red feeder. Soni and I both bought one, as well as the nectar and a "waspinator". The hummingbirds find this feeder easy to use and even like to perch on the little rail. There also is a moat in the center to prevent ants from getting into the nectar.
Sure enough, hummingbirds came to my feeder within a day of me hanging it up! I've had a different feeder years ago, but I haven't seen as many hummingbirds as I do now! Birds come to this feeder all day long. It is so exciting to see these little colorful birds fly over and take a drink. It just puts a big smile on my face.
I then became determined to snap a picture of these beautiful birds. It's not as simple as you may think. These birds are so fast. You have to be ready with your camera at a moments notice. I would sit out on my deck, but no birds in sight. But I didn't give up. I was determined and was hoping that by the end of the season, I would have a picture or two.
Last week when I was out on my deck taking pictures of the "round wall hanging", I turned around when I heard the humming. And since I already had my camera in hand, I was able to snap a few pictures!!!
Aren't these birds just gorgeous!!!
Now remember, the hummingbird is very popular and so is the hummingbird die that is from Elizabeth Crafts. It is perfect for your summer projects like for example this beautiful card Els Van de Burgt made.
She used the hummingbird and fern dies, shimmer sheetz and micro fine glitter; all of which are presently in stock! Stop by today to get your supplies.
Oh yes, as for the "waspinator", it works great. It's a large grey bag that is supposed to look like a wasp's nest. Wasps are very territorial and when they see this "nest", they turn away not wanting to trespass on what they think is already claimed ground. So far, it is working. I don't see any new nests being built and I have always had wasps building nests on my house siding. Thank you Tina and Susan for your expertise!
Thanks for "flying in"
~Anna
Oh yes, as for the "waspinator", it works great. It's a large grey bag that is supposed to look like a wasp's nest. Wasps are very territorial and when they see this "nest", they turn away not wanting to trespass on what they think is already claimed ground. So far, it is working. I don't see any new nests being built and I have always had wasps building nests on my house siding. Thank you Tina and Susan for your expertise!
Thanks for "flying in"
~Anna
Wednesday, November 16, 2011
Thanksgiving Day Card & Matching Candle
It is always fun to use our craft to make more than just cards. This was true this past Saturday when everyone went home with a beautifully decorated candle as well as Thanksgiving Day cards.
Place the decorated candle in a clear plastic bag, tie a beautiful ribbon to close the top and you have a great hostess gift! Think about a Christmas themed candle for more wonderful hand made gifts from your heart. I know we all run out of ideas on what to get everyone. Hand decorated scented candles are always appreciated and as you can see, they are not too difficult to make.
Hope you'll take some time to make some hand made gifts for the upcoming holidays.
Place the decorated candle in a clear plastic bag, tie a beautiful ribbon to close the top and you have a great hostess gift! Think about a Christmas themed candle for more wonderful hand made gifts from your heart. I know we all run out of ideas on what to get everyone. Hand decorated scented candles are always appreciated and as you can see, they are not too difficult to make.
Hope you'll take some time to make some hand made gifts for the upcoming holidays.
Friday, November 4, 2011
Another Christmas Card
I have been wanting to make a Christmas card using the Marianne Creatables LR 0182 Christmas ornament die (the set comes with this ornament and the bell die) with the Marianne Creatables LR 0181 pine tree branch. And this is what I came up with:
I kept it simple with just two colors for the card and glitter, of course! Elizabeth Crafts micro fine glitter in Sahara makes the ornament really sparkle. I highlighted the pine branch with stickles, embossed the shiny white card stock with the snowflakes embossing folder, added a greeting and ribbon and voila, I was done!
Hope you're getting in some craft time for your Christmas cards!
Happy Stamping,
Anna
I kept it simple with just two colors for the card and glitter, of course! Elizabeth Crafts micro fine glitter in Sahara makes the ornament really sparkle. I highlighted the pine branch with stickles, embossed the shiny white card stock with the snowflakes embossing folder, added a greeting and ribbon and voila, I was done!
Hope you're getting in some craft time for your Christmas cards!
Happy Stamping,
Anna
Wednesday, August 31, 2011
Beautiful Glitter Cards by Soni Larson!
Today is Wednesday, and I hope all of you are safe and things are returning back to normal after Irene. I lost power for 2 days but thanks to wonderful friends, I stayed at Soni's Monday night. Thankfully I did not have any damage.
Now that fall is approaching, hope you will start thinking about your craft projects. Here are two gorgeous cards that Soni made with the Elizabeth Crafts micro fine glitter.
This Thanksgiving Day card really sparkles. It's such a simple card, yet makes a big impact! (Soni used JustRite Stamps for the saying and the frame.)
This card was colored with Copics over the highlights glitter. Again, a very simple design but just fabulous! You really need to see these cards in real life. The pictures do not do them justice.
Now that I have power, you'll be happy to know that I submitted the glitter order and shortly you'll be able to make these kinds of cards also. Lots of new colors will be in, such as apricot, poppy orange, apple red, Canadian blue, hunter green and more. Just think fall leaves, Christmas poinsettias, and snowmen. It'll be here before we know it!
Thanks for stopping by and
Happy Stamping,
Anna
Now that fall is approaching, hope you will start thinking about your craft projects. Here are two gorgeous cards that Soni made with the Elizabeth Crafts micro fine glitter.
This Thanksgiving Day card really sparkles. It's such a simple card, yet makes a big impact! (Soni used JustRite Stamps for the saying and the frame.)
This card was colored with Copics over the highlights glitter. Again, a very simple design but just fabulous! You really need to see these cards in real life. The pictures do not do them justice.
Now that I have power, you'll be happy to know that I submitted the glitter order and shortly you'll be able to make these kinds of cards also. Lots of new colors will be in, such as apricot, poppy orange, apple red, Canadian blue, hunter green and more. Just think fall leaves, Christmas poinsettias, and snowmen. It'll be here before we know it!
Thanks for stopping by and
Happy Stamping,
Anna
Tuesday, June 7, 2011
Coloring Glitter with Copics
You start with a peel off sticker and the trick here is to place it on a craft sheet, with the sticky side UP.
It is now easy to transfer the peel off to your cardstock that is already prepared with the adhesive. With the peel off on the cardstock, you then add the highlights glitter; and don't forget to burnish it with your finger.
Once that is done, you can start coloring the glitter. You just need one color and the blender pen. The biggest trick is keeping the glitter out of the tip. I found that you do more of a dab with your marker. I start in the edges. The ink starts out dark there and it quickly spreads. The color stays within the borders of the peel off and you use the blender pen to pull more color out. As you are pulling the color out, it simply gets lighter and that is how you get the fine blended look.
You repeat this in each section of the peel off and then just cut out your image.
Once you start coloring and seeing the fantastic results, you just can't stop. You start looking at your peel offs in a whole new way!
Hope this inspired you to try this fun and fabulous looking technique.
Anna
Wednesday, March 30, 2011
Glitter, glitter and more glitter!
Barbara, Soni and I are back from Boston, where we attended the Collins Group Trade Show. We had a great time taking LOTS of classes, learning new techniques, seeing lots of new product, making plenty of samples and meeting such talented people in our industry.
One of the things that WOWED everyone was this new, micro fine glitter. It was the hit of the show.
And here is Els van de Burgt, owner of Elizabeth Craft Designs with a sample board of the beautiful cards she made with this fabulous glitter.
I took her class and made the following two cards. Unfortunately, the pictures do not do the cards justice. The technique is quite simple and you end up with a gorgeous card that sparkles to the hilt yet feels so smooth to the touch! And so the name of the technique - the burnished velvet technique. You end up with a truly elegant card.
Stop by the shop and see these cards in person - you will not be disappointed.
I can't wait for the glitter to arrive so we can have some classes in making these stunning cards!
Thanks for stopping by,
Anna
Subscribe to:
Posts (Atom)