Showing posts with label Spellbinders nestabilities. Show all posts

Friday, May 26, 2017

Oh, the Ever So Cute Japanese Paper Dolls

I have been having a ball with these new dies from Frantic Stamper called, Kokeshi Japanese Paper Dolls die set. They are just so cute!!! And what's neat is that you can cut out 6 different hair styles with ONE pass of your die cutting machine! I do wish it had more "body" dies, but I did get around that.  Since the die is not detailed at all, I ran two pieces of card stock with the die and therefore got double the amount of base bodies as opposed to only using one piece of card stock.

Here is what I came up with:


And here are a bunch of dolls that I just put together. I had so much fun watching them "grow" and choosing the varies hair styles as well as the different color kimonos. With these dolls, I will be ready to put a card together in just about no time.

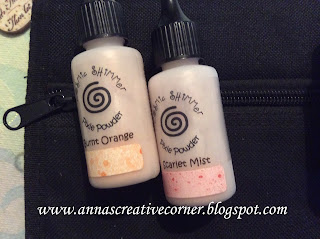
And let me show you what the background card stock looks like when I cut out all the pieces.  I used Cosmic Shimmer Pixie Powders to create the backgrounds.  It is very simple to use these powders; just sprinkle on the card stock and mist it with water.  The result is a beautiful shimmery watercolor background! The MICA is these powders is what gives it the shimmery shine which is perfect for this project making the kimonos look like real satin!


Hope you get inspired and start playing with these Pixie Powders.

Have a wonderful Memorial Day Weekend,
Anna

Supplies Used:

Dies:  Frantic Stamper Japanese Dolls, Spellbinders Nesting Scalloped and regular rectangles, Impression Obsession small tags, Marianne Creatables Butterflies set
Other: Cosmic Shimmer Pixie Powders

Wednesday, July 1, 2015

Awesome Flower Tags! and a Baby One too!

Happy July !!!  Due to popular demand, we will be repeating the Flower Tags Workshop this Sunday, July 5th, at 1:30pm.  (Don't worry, this should give everyone enough time to attend church before class.)


You'll make these 4 fabulous tags PLUS this very cute giraffe tag!!!!


Tags are so versatile, especially when you seem to run out of time to make a card!!! LOL And it always seems to happen to me!!!
I therefore, just added the orchid tag to the gift bag and look how it saved the day!!!


Supplies used:
Dies:   Orchid and Love dies by Dee's Distinctively Dies, Spellbinders Romantic Rectangles, Impression Obsession Mini Tags, Small Picket Fence and Mini Solid Butterflies, Pansy flower by Leane Creatief, Sunflower by Marianne Creatables, Cheery Lynn's Chrysanthemum and leaf flourish
Stamps:   Impression Obsession, Lawn Fawn and Outlines

Thanks so much for "stamping" by,
                ~Anna

Monday, February 9, 2015

Love is in the Air

Join us for a cute Valentine Make and Take this Saturday, February 14th.


This owl stamp from Lawn Fawn is so cute and even though it comes in a Christmas stamp set, it can be used for any winter occasion.

Supplies used:
Stamp:  Lawn Fawn
Dies:  Impression Obsession Bare branch and heart border, Dee's Distinctively With        Love, Spellbinders Classic Circles nestabilities
Other:  Marvy tiny heart punch, Copic markers, stickles

Hope this card warms your heart and makes you feel warm on this cold and snowy day.
Thanks for stopping by,
             ~Anna

Friday, October 24, 2014

A Clean and Simple Christmas Angel Card

I love angels and the Impression Obsession new angel die set makes two pretty angels perfect for Christmas cards.

The gold card stock makes this card very regal and yet the design is simple enough that you can mass produce it.

If you haven't started your Christmas cards, hope this gives you the inspiration to start!  Christmas will be here before we know it!!!

Supplies used:
Dies:  Impression Obsession angel set, Spellbinders floral ovals
Stamp:  Joy to the world
Embossing folder:  Joy crafts

Thanks so much for "stamping" by,
                    ~Anna

Tuesday, October 14, 2014

A Beautiful Christmas Cardinal

Happy Tuesday!
I finished this card for the Christmas card class this past Sunday and finally got around to take a picture of it! 

I just love this beautiful cardinal!  

You know, there are some cards that you finish and you truly love the way it turned out.  Well, this is one of those cards!  I have it sitting on top of the small TV in the kitchen so that I can enjoy it while I have my meals!

Everyone in class loved this card also - it is simple yet very elegant.  The cardinal is just gorgeous and the 3 wings layered onto the body gives it so much depth.   The bit of diamond stickles gives the whole card a pretty sparkle.

Here you can see the detail and depth of the card.  I think I will be making several of these this Christmas.  Even though this is a simple design, it does take a bit of time with all of the cutting and building of the layers, but it is soooo pretty!

Let me know if you would like this cardinal die, as I will be ordering more of them this week.  I want to make sure I get enough and that no one will be left out!

Supplies used:
Dies:  Dee's Distinctively Dies right facing cardinal, Impression Obsession pine branch, Spellbinders floral ovals and classic ovals
Other:  Sizzix snow embossing folder, Diamond stckles, Copic markers

Enjoy the warmer weather!  It'll be cold soon enough!
                          ~Anna

Sunday, June 29, 2014

Simple Birthday Card

Good Morning fellow crafters!  I finished a simple birthday card several days ago and now I can post it.

 I love white on white cards, but here I wanted to add a very pretty teal accent and of course some diamond stickles sparingly throughout the background;  very simple, didn't take too much time and yet very pretty.

Supplies used:
Dies:    Marianne Creatables garden branch and Anja card stand, Cheery Lynn butterfly and flowers from the  baby's breath set, Impression Obsession tiny flowers, Spellbinders labels 18
Stamp:  Hero Arts
Ink:      Brilliance pearlescent jade

Thanks so much for "stamping" by,
               ~Anna

Wednesday, May 7, 2014

Elegant Birthday Card

Happy Wednesday!

Just a quick share of an elegant birthday card I created for a friend recently.  It is a simple design with the new Anja border die set; cut twice, once on top and then on the bottom. 


This is a really pretty die and can be used lots of ways.  I am sure you will also find it versatile.

Supplies used:
Dies:  Marianne Creatbles Anja Border die set, Spellbinders Labels 4
Stamps:  Serendipity
Other:  Viva Decor pearl pens

Thanks so much for "stamping" by
      and have a wonderful day!
               ~Anna

Saturday, April 26, 2014

Another 3-D Pop Up Card in a Box!

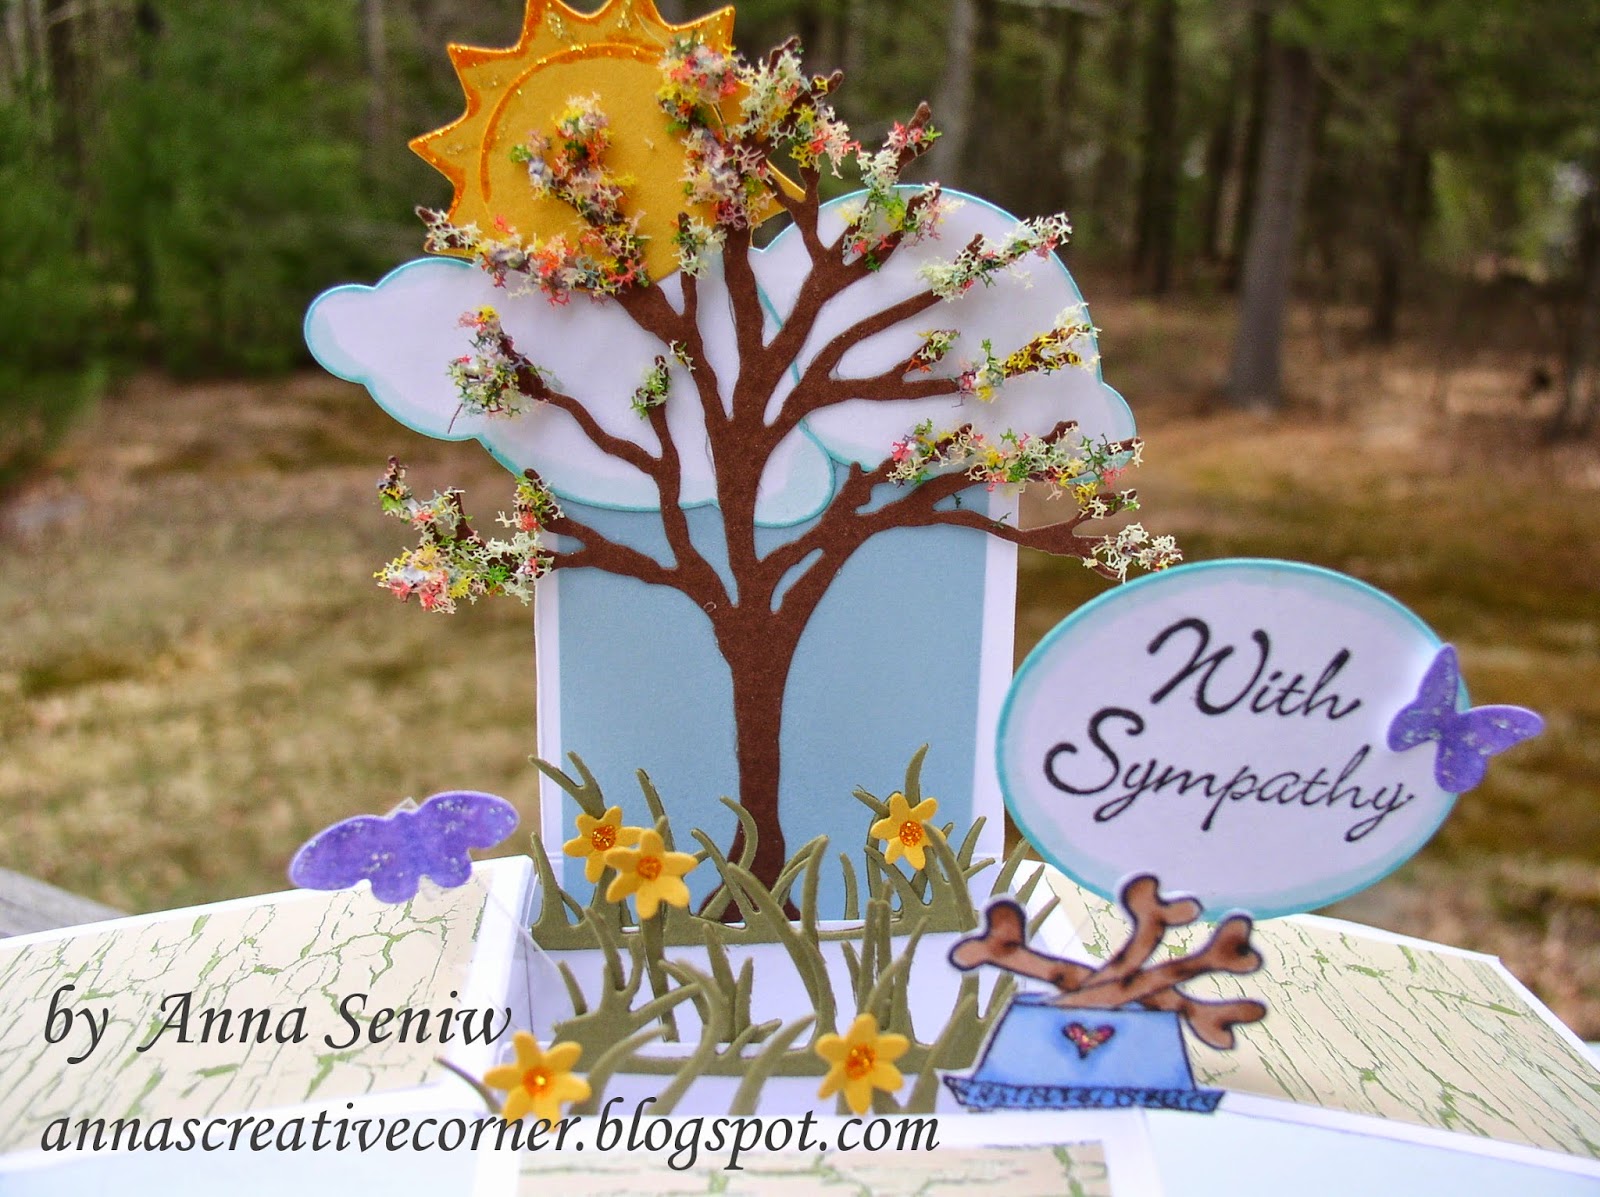
My good friend Maryanne lost her beloved dog recently and I wanted to create something special for her. I decided on a card in a box and presented it to her yesterday.  She was very surprised and so sweet by promising to display and keep this card by Teddy's urn.


I truly enjoyed making this scene in the box; it was a lot of fun picking the various components and watching it all come together.  These 3-D scenes are addicting!

If you are curious how to make these 3-D pop up cards in a box, please join us on Saturday, May 17 and create 2 such great cards!  These are so very popular now; don't miss out on the chance to learn how to create them!  Please call and reserve your seat today!  You will not be disappointed.

Supplies used:
Dies:  Impression Obsession bare tree, clouds, sun & moon set, butterfly set, & tiny flowers set
Cheery Lynn grass border, Spellbinders classic ovals and labels 4
Stamps: Impression Obsession sympathy sentiments cling set
Other:  Copic markers, Flower Soft, & stickles

Hope you have a wonderful weekend,
               ~Anna

Sunday, February 23, 2014

Great Masculine Birthday Card with Little Deer!

Hello Everyone!
I just wanted to share with you a great card that Soni Larson made for her son!  I just love it!


As I said before, these deer dies have become so very popular and for good reason.  We used them on Christmas cards and they make great masculine nature themed cards.

Supplies used: 

Dies:  Impression Obsession small deer set, Impression Obsession fir trees and fir tree border,
          Spellbinders classic nesting ovals
Embossing folder:  Sizzix snow
Card stock:  Soni used some special pre-embossed "bark" card stock and "wood" card stock for the deer

Thanks for "stamping" by,
         ~Anna

Thursday, October 31, 2013

Poinsettias on a Christmas Tree

Hi Everyone!

Christmas is only a little more than 7 weeks away!!!  Time is just flying by and so I created another Christmas card for you!

Very simple but elegant.

And here is a close up of the flowers:


Supplies used:
Dies:  Dee's Distinctively Dies - Tress and set of mini stars, Impression Obsession "Hydrangea" set,  Spellbinders Romantic Rectangles, Anja card stand
Embossing folder: Sizzix
Other:  Gold stickles

Have you started your Christmas cards yet?

Looking forward to seeing your creations!  Please share them on our Facebook page!
Thanks!
              ~Anna

Monday, September 23, 2013

Great use of Snowmen "Toppers"

Happy Fall!
Yes, fall came in yesterday and now time is just ticking away.  Have you started your Christmas projects yet?  I got these snowmen "toppers" in and they are not only gorgeous but so easy to use.  I made a tag and then used a different snowman topper to make a card. (Basically, take the tag and expand it onto a card!)


These toppers are simply great if you want to mass produce some tags or cards.  These snowmen are so cute, made of excellent card stock quality, already pre-cut for you and with gold foil and glitter!  You get 10 different snowmen in the package! 


Each snowman is package in an envelop with the 3 layering pieces!  You just take one envelope out and put the guys together.  (only 3 layers to build!)  Layer the completed snowman on a tag or continue making a card.  Soooooo simple and quick!  I know I will make 10 quick cards and have these guys ready for sending out in December!  And the whole package of 10 snowmen go for only $8.25!


And to see how nice and quick these are, come by on Saturday, September 28 and make a tag!!!  You are going to fall in love with these guys!


Yes, since it is now count down to Christmas making ideas, I will try to have as many Make and Takes for you!  Next Saturday,  October 5 will be a Pergamano Make and Take!!!  I'll post that tomorrow!

ALSO, on Saturday, October 5 at 1PM, we'll have the very popular, Tag You're It class!!!  Come and make several Christmas tags PLUS a tag for a wine bottle that you will be able to use for Thanksgiving!

Fall is here and the Creative Corner is here to help you make your holidays fun and creative!!!

See you real soon!
     ~Anna

Monday, August 26, 2013

The Beautiful Parasol Die from Marianne

Good Monday Morning!

I just wanted to share a card that Virginia Behrens made using the beautiful parasol die from Marianne.  When I first saw this die, I thought, pretty, but how many times will I use it?  I mean, how many showers do I get to go to?  Believe me, not many.  My own daughter doesn't even want a traditional bridal shower!

But Ginny took this parasol, turned it over, filled it with flowers and hearts and made a gorgeous "Get Well Card"!!!

This goes to show you that you should really think outside the box and try to get multiple uses for your dies and stamps as well!

Dies:  Marianne Creatable LR0263
          Anja Corner LR0200
          Spellbinders Nestabilities Classic Scalloped Circles

Thanks so much for "stamping" by,
                ~Anna

Monday, June 10, 2013

Cards from the "To Distress or Not" Class

First I would like to thank everyone who came to the class and helped make it such a success!  We created, caught up with news and laughed all afternoon.  What more could we have asked for?  Too bad that Korkie and Jan weren't feeling well and did not make the trip up.  We missed you both!   I also have to say that I missed Jan's cute British accent.  Hope you are feeling better and looking forward to see you soon!

I also want to thank Barbara for teaching and bringing the vintage and distress look to us again.  You really made everyone think outside the box!

Here are the cards we made:
These are the 3 cards with the distressed look.

And these are the non-distressed cards (I guess we can call  them the clean cards).

Next, are pictures of the cards side by side.  We basically used the same design layout and the same supplies, and came up with two different looks!  It was just amazing!


Hope these samples get your creative juices flowing!

Thanks for stopping by!
         ~Anna

Wednesday, May 29, 2013

A Sympathy Card

Impression Obsession has a very nice saying stamp for sympathy cards and I used that stamp as the starting point for my card that I recently had to make for a fellow parishioner who lost her young husband. 


I made a frame with the Spellbinders Labels Two and stamped the saying inside of it.  I layered it on card stock that I embossed with the new embossing folder from Crafts-Too and then decorated around the frame with flowers and leaves.  The last touch was the Cheery Lynn butterfly and of course a bit of stickles strategically placed.  Oh yes, I also used Viva Decor pearl pens to make pearls for the centers of the flowers and the body of the butterfly.

You may be surprised that this is a sympathy card, but not all sympathy cards have to be of a dark color palette.  Dark colors sometimes make the card look a bit too sad and most of the time I try to stay away from them.  Hope this gives you some inspiration for these sometimes difficult cards to make.

Thanks for stopping by,
            and
Have a wonderful day
         ~Anna


Wednesday, May 8, 2013

A Fun Birthday Card

Now, when I saw this Impression Obsession stamp, chicken in overalls, I thought, OK, it's cute but what can you make with it?  Well, don't worry, Soni Larson knew what to make!

She created a fun birthday card for Cecilia Prange!  Isn't it just fabulous!  Great coloring with Copics and the layout and colors of the background papers are just perfect.  The window is framed nicely and the sayings are all FUN! (They were computer generated.)  Thanks Soni for this wonderful idea!

 Who would have thought.  And the ladies who saw it on Saturday, all now want this stamp! LOL!


This is the inside of the card:
And it's all in good fun!

Hope this puts a smile on your face today!
            ~Anna


Friday, May 3, 2013

May Flowers

It's May, it's May, the merry month of May!  And I always think of flowers and Camelot!  Remember the fun song with all the maidens dancing?  It always puts a smile on my face.

I just love Julie Andrews' voice, but when I think of Camelot,  I also reminisce of my daughter's high school production of it.  I was at awe when I saw it; Rachel Waldren was wonderful as Guenevere, JJ Hansen was King Arthur and Greg Biccum was Sir Lancelot.  Their voices were awesome!  The WHOLE production was just FANTASTIC; you couldn't believe that it was a high school production!  I know that Maria must be smiling while reading this! (Or at least I hope so.)  I also can't believe  that it was more than 10 years ago!  Which reminds me, I better send out the video tape to have it digitized!  Well, enough of reminiscing, and let me tell you about today's card.


I went through my large envelope of stamped images that I have already colored or partially colored.  It was time to put a card together!  And since the weather has been so nice, I pulled out this pretty image from Impression Obsession.  I was drawn to the pretty umbrella and the old fashioned flower cart.  I used Copics to color the image and I paper pieced the umbrella.  I added two layers of foam tape to the center of the umbrella and then adhered the ends straight to the card.  This gave the umbrella a realistic curved look.  Since the image is so large, I just layered it onto a pretty Spellbinders rectangle and added some die cut flowers, flourishes, and butterfly for some depth and interest.

Thanks for walking down memory lane with me and I hope it gave you some inspiration to create some "flower" cards!

Looking forward to seeing you and your creations!
                     ~Anna

Thursday, April 25, 2013

New Cameo Frame Die and Punch Set

Hello Fellow Stampers!
I know you have been patiently waiting for these new cameo frames and punch sets and they have finally arrived!!!  I also couldn't wait to get my hands on them and make a sample.

I kept the design of the card simple because I wanted the Cameo to be the focal point. 

Here, you can see that the frame of the cameo comes from a die.  Next you punch out the oval and place it in the embosser to get the pretty raised image of the lady.  I used pink Bazzill paper (the smooth side) and embossed the image.  I then used Colorbox cat's eye Frost white ink directly to the paper to get the cameo lady creamy white.

These cameos come in 3 sizes; small, medium and large.  I used the large one on my card, again because I wanted it to be the focal point.

These just arrived from Europe and since they are so unique, I am sure that they will be a hit. Let me know if you would like one of these sets and I can set it aside for you!

Thanks for stopping by,
        ~Anna

Saturday, April 13, 2013

Pretty Pink Hydrangea

After completing the blue green hydrangea, I wanted to make a pink one.  This time I used Copic re-inkers to make my background paper.  (Copics are alcohol based and therefore you can use them just like other alcohol inks,)  I used RV10 and V12 and squirted a few drops on my felt covered block and decorated my glossy white card stock.

I used the Impression Obsession Hydrangea die set again, but this time I made a white on white card with only pink for the flowers and the bow.


I think everyone knows that I love flowers!  They just make me smile and feel great and therefore, I truly enjoy making paper flowers.  I hope you get inspired and try some flowers for your cards.  They make such a beautiful statement!

Thanks for stopping by,
      ~Anna


Monday, April 8, 2013

Let's Celebrate Spring with a Pretty Hydrangea

The other day I was in a store and I saw these pretty potted hydrangeas.  The flowers were not in full bloom so they were "blue green" in color.  Right then and there it hit me that I had a very similar color palette on my work table back in the studio.  I had made some backgrounds with alcohol inks and I then knew that I could use them to make my very own paper hydrangeas!

I used the Impression Obsession Hydrangea stamp and die sets and went to town!  I really enjoy cutting out the pieces and then layering it all together!  I get lost in the whole process and find it so relaxing.

The die set comes with everything you need to make one flower.  I stamped the stem and the leaves and die cut them out.  I then cut out the background piece for the flower which I then layered all the little flowers on top. (A wonderful time saver is when you cut the little flowers.  That die cuts 8 flowers at a time.)

This is a close up of the detail!  

I also gave the flower dimension by adding two layers of foam tape behind the center and then only one layer of foam tape on each of the sides.  This gave the flower a curved look.

Lastly I used a Viva Decor pearl pen to add pearls to the centers of the little flowers and some stickles on the leaves.

Everyone who has seen this card just loved it and went over to the peg board to get the dies and stamps!  Let me know it you want a set, as these are going like hot cakes!

Thanks for stopping by,
        ~Anna

Tuesday, February 5, 2013

Chevrons Made with Square Nesting Dies!

As you know, I am taking the CAS card class.  Saturday,  JJ Bolton showed us how to make chevrons with square dies!  What a clever idea and a great way to "stretch" the use of your dies!  I couldn't wait to go and try it out!  Believe me, it was as simple as she had demonstrated!  The hardest part was to evenly space the nesting square dies and tape them down.  I used "Post-it" tape and it worked wonderfully.  Another great tip was to use the same Post-it tape and lay the chevrons on it.  This way you can space them out evenly and then adhere them to your card all in one step.

When I passed the dies through my Big Shot, I ended up with 8 chevrons.  Each time I used a different color card stock, I got 8 more chevrons.  Once that was done, I only had to put the card together.  I just love this bold and modern look.

I then had to try another color combination and thought of a patriotic card for our soldiers.

Stop by if you need some extra help or tips in getting your chevrons done.  These are so addicting, you won't be able to stop making them!

Looking forward to seeing you,
           ~Anna